Want to install Ubuntu on your Windows 10 but not sure where? You’re in the right place! We’ll show you how to find your Ubuntu installation in Windows 10. This will make setting it up smooth. It’s crucial for developers and tech fans to know this to get the most out of Ubuntu. Let’s get started!
Installing Ubuntu on a dual storage machine is simple if you follow some steps. You’ll need to create a bootable USB, enter the BIOS screen, and pick the right options when installing. This will help you successfully install Ubuntu on your selected storage devices.
Instructions
Create a bootable USB: Download the Ubuntu ISO file and use a tool like Rufus or Etcher to create a bootable USB drive. This lets you install Ubuntu from the USB, avoiding the need for a CD or DVD.
Access the BIOS screen: Restart your computer and press the designated key (e.g., F2, Del) to enter the BIOS settings. Check your computer’s manual or the manufacturer’s website to find out the exact key.
Select the bootable USB from the Boot Menu: When in the BIOS settings, go to the Boot Menu and choose the USB drive as the primary boot device. This ensures your computer boots from the USB when you’re installing.
Add the option “pci=nomsi” in the GRUB screen: If you see the GRUB boot loader screen during the Ubuntu installation, press “e” to edit the boot options. Add “pci=nomsi” at the end of the line that starts with “linux”. This helps fix compatibility issues with some hardware setups.
During the Ubuntu installation process, select “Erase disk and install Ubuntu” and choose the SSD for installation: When asked about installation options, pick “Erase disk and install Ubuntu” for a clean setup. Make sure you select the SSD (Solid State Drive) as your installation destination to benefit from its fast speed and efficiency.
By following these steps, you’ll manage to install Ubuntu successfully on your dual storage setup. Using both an SSD and HDD allows you to enhance your system’s storage and performance.
Troubleshooting Dual Storage Installations
When installing Ubuntu with a dual storage setup, you might face some challenges. These could make Ubuntu start only in recovery mode or mess up your screen resolution. But, you can fix these problems with a few steps, helping you get Ubuntu set up properly.
Formatting both the SSD and HDD using GParted
Formatting both the SSD and HDD with GParted is a common fix. GParted is a useful tool for managing disk partitions.
This step makes sure both devices are ready for Ubuntu. It removes any data or settings that could cause conflicts.
If your PC has an Nvidia GPU, updating its driver might help. Here’s how to do it:
Go to the Nvidia website and get the newest driver for your GPU.
Start Ubuntu, open the terminal.
Follow Nvidia’s guide to install the driver.
This update lets your Ubuntu use your Nvidia GPU to its full potential.
Re-enabling Secure Boot Control in the BIOS
Sometimes, turning Secure Boot Control back on in the BIOS is needed. Here’s how:
Restart your PC and press the key for BIOS (usually Del, F2, or F10).
Find the Security tab.
Turn on Secure Boot Control.
Turning Secure Boot Control on makes sure your Ubuntu installation is secure and stable.
Tackling these steps will help you fix issues with dual storage installations. Then, you can enjoy Ubuntu on your preferred devices.
Clean Up After Unsuccessful Installations
After successfully installing Ubuntu, it’s crucial to remove any leftovers from failed tries. These leftovers can cause trouble and affect Ubuntu’s performance. To tackle this, follow these steps:
Step 1: Boot with a Bootable USB
First, create a bootable USB with Ubuntu’s installation file. Then, put the bootable USB in your computer and restart it. Ensure your computer’s BIOS is set to boot from the USB. This lets you enter the Ubuntu space needed for clean-up.
Step 2: Format the SSD and HDD using GParted
GParted is a tool for managing your disks in Ubuntu. When in Ubuntu, start GParted and find the SSD and HDD. Click on each and choose “Format” to clear them. This erases old installation bits, making the disks ready for new starts.
Remember, formatting wipes all data, so back up vital files first.
Quote: “Cleaning up after a botched installation is key for a stable Ubuntu system.” – Ubuntu User
By finishing these actions, you’ve cleaned up after a failed Ubuntu install. Your computer is set for a new install or other setups.
A tidy install environment is key for Ubuntu to work right. With these clean-up actions, you remove any failed trial signs. This prepares for a smooth Ubuntu journey.
If problems remain or you have questions, check Ubuntu’s official guides or visit Ubuntu community forums.
Updating the Nvidia Driver
If you’ve got an Nvidia GPU and just put Ubuntu on your computer, you’ll need to update the driver. Doing so ensures your Nvidia GPU works its best. Here’s how to keep it current.
Download the latest Nvidia driver: Head over to the Nvidia website (https://www.nvidia.com/). Look in the driver download area. Find the driver that matches your GPU model and Ubuntu version, then download it.
Boot to terminal mode: After downloading, reboot your Ubuntu system. As it starts, hit Ctrl+Alt+F3 to enter terminal mode. This lets you install the driver without the desktop getting in the way.
Install the driver: In the terminal, go to where your Nvidia driver download is. Run the command sudo sh ./filename.run to start installing. Follow the prompts to finish up.
Additional steps: Your system might need more steps. You might have to get a helper file or use auto-install for the advised driver. Check Nvidia’s guides for help tailored to your setup.
After installing, restart your machine to turn on the new Nvidia driver. Your Nvidia GPU should now work better and more compatibly.
Remember, it’s crucial to keep your Nvidia driver updated. This ensures top performance and lets you use the newest features and upgrades.
Finding the Installed Nvidia Driver Version
To check your Nvidia driver version on Ubuntu, use this terminal command:
nvidia-smi
This will show a detailed report about your Nvidia GPU, including the driver version.
Updating the Nvidia Driver Using the GUI
Prefer a graphical way to update? Ubuntu has a tool called “Software & Updates” for managing drivers, including Nvidia’s. Here’s how to use it:
Open “Software & Updates”: Press the Super key (Windows key). Type “Software & Updates” and select it.
Go to the “Additional Drivers” tab: Click the “Additional Drivers” tab in the window. It shows drivers for your computer’s hardware.
Select the Nvidia driver: Pick the latest Nvidia driver listed and press “Apply Changes.” Ubuntu will handle the download and install.
Restart your system: Once installed, a system reboot activates the new Nvidia driver.
The GUI method is user-friendly, great for those who prefer visual steps.
Note, updating the Nvidia driver might need admin rights. So, ensure you’re allowed to install.
With your Nvidia driver up to date, expect better performance and compatibility on Ubuntu.
Benefits of Updating the Nvidia Driver
Challenges of Updating the Nvidia Driver
Enhanced GPU performance
Stronger compatibility with fresh software
New features and fine-tuning available
Bug fixes and more stability
Older hardware might not work as well
Installing drivers can be tricky
Sometimes clashes with other computer parts
You might have to go back to an old driver if problems happen
Re-enabling Secure Boot Control
Turning off Secure Boot Control during the Ubuntu install might need a fix. It’s key to turn it on again in the BIOS to keep your system safe. It checks digital signatures of boot loaders, stopping untrusted code. So, enabling it makes your Ubuntu safer.
Here’s how to turn Secure Boot Control back on:
Restart your computer and press the key for the BIOS menu (usually Del, F2, or F10) during startup.
In the BIOS menu, use the arrow keys to find the Security tab.
Find and select the Secure Boot Control option.
Turn on Secure Boot Control.
Save your settings and exit the BIOS menu.
Doing these steps enables Secure Boot Control again. It makes sure your Ubuntu starts safely.
Steps to Re-enable Secure Boot Control
1. Restart your PC and open the BIOS menu with the right key (Del, F2, or F10).
2. Go to the Security tab in the BIOS menu.
3. Choose the Secure Boot Control option.
4. Enable Secure Boot Control.
5. Save and exit the BIOS menu.
The Journey Continues
Working with technology is a challenging journey. Complexity in computers can lead to frustration. Yet, it’s crucial to keep a positive attitude when faced with difficulties.
As a developer, facing IT hurdles is a common part of the job. With determination and the right mindset, these obstacles can be overcome. This opens the way for development and growth.
Choosing Ubuntu as your operating system brings benefits. Its versatility and reliability are great for development. Being open-source, it encourages sharing ideas and innovating together.
Ubuntu has vast community support and many development tools. This makes it perfect for tackling big projects. Whether you’re into web development, data analysis, or machine learning, Ubuntu has what you need.
“Ubuntu empowers developers to push boundaries, explore new ideas, and create meaningful solutions. It’s a platform that supports growth and innovation in the development community.”
If you’re experienced or just starting, Ubuntu is a great base for your work. Its strong security and frequent updates offer a stable and safe space for developers. This stability lets developers focus more on coding and problem-solving.
Stay connected with the Ubuntu community. Join forums, attend virtual meetups, and work with other developers. The community’s support and knowledge can help you overcome any development challenges.
The life of a developer has its highs and lows. Tackle the challenges head-on, learn from them, and keep growing. With Ubuntu by your side, there’s no limit to what you can achieve.
Developers Share Their Ubuntu Experience:
Developer
Industry
Experience with Ubuntu
Emily Johnson
Web Development
Ubuntu was a game-changer for me. Its stability and versatility allowed me to build and deploy web applications with ease. The Ubuntu community provided exceptional support and resources throughout my journey.
David Patel
Data Science
Ubuntu played a crucial role in my data science projects. Its compatibility with popular data science libraries and tools made it the perfect environment for analysis and machine learning. I highly recommend Ubuntu for any data scientist.
Michael Thompson
Software Engineering
Ubuntu has been my go-to choice for software development. Its reliability and security features gave me confidence in my work. The Ubuntu community’s dedication to continuous improvement is truly impressive.
Conclusion
Setting up Ubuntu on a Windows 10 computer with two storage types can be tricky. Yet, by sticking to given steps, fixing any problems, and keeping the install area clean, you can make it work.
Remember to update the Nvidia driver during setup for the best performance. Turning on Secure Boot Control in the BIOS settings afterwards will also make your system more secure.
Getting used to Ubuntu as your operating system will have its challenges. But, by keeping at it and staying positive, you’ll get past any difficulties. IT issues are common, but with a good attitude, they’re nothing you can’t handle. This will keep you moving forward on your Ubuntu journey.
FAQ
Where is Ubuntu installed within Windows 10?
Ubuntu from the Windows Store goes in the appdata directory. For WSL2, use “\wsl$” to access the home directory from Windows. In earlier Windows Subsystem for Linux versions, find Ubuntu’s files at %localappdata%\Lxss.
How do I install Ubuntu on a dual storage machine?
To do this, create a bootable USB first. Then, go to the BIOS screen, and pick the USB from the Boot Menu. Add “pci=nomsi” in the GRUB screen. When installing Ubuntu, choose “Erase disk and install Ubuntu.” Select the SSD for the install.
What issues can arise during the Ubuntu installation on dual storage configurations?
Issues like only loading in recovery mode and wrong screen sizes can happen. To fix, format both SSD and HDD with GParted. Update the Nvidia driver if you have Nvidia GPU. You may also need to turn Secure Boot Control back on in the BIOS.
How do I clean up after an unsuccessful Ubuntu installation?
If the install didn’t work, boot with a bootable USB. Use GParted to format the SSD and HDD. This makes sure your installation starts fresh.
How can I update the Nvidia driver in Ubuntu?
With an Nvidia GPU, updating the driver is key for good performance. Download the latest Nvidia driver. Then, boot to terminal mode to install the driver. You might need to install a helper file or use auto-install for the recommended driver.
How do I re-enable Secure Boot Control after Ubuntu installation?
After installing, turn Secure Boot Control back on in the BIOS. Get into the BIOS menu, go to the Security tab, and switch on Secure Boot Control.
How should I approach working with Ubuntu and encountering challenges?
Embrace the tech journey. Computers can be tricky and sometimes annoying. But staying positive and determined helps beat any challenges. As a developer, facing issues with IT is normal. The right attitude means you can beat any tech problems.
How can I successfully install Ubuntu on a Windows 10 dual storage machine?
Success comes from following the given steps, fixing any problems, and preparing a clean installation area. Make sure to update the Nvidia driver if needed and turn Secure Boot Control on in the BIOS. Face challenges head-on and enjoy learning Ubuntu.
For better security and ease of use, it’s crucial to install the fingerprint driver for Windows 10. This driver lets Windows apps read and recognise fingerprints. Our guide makes installing…
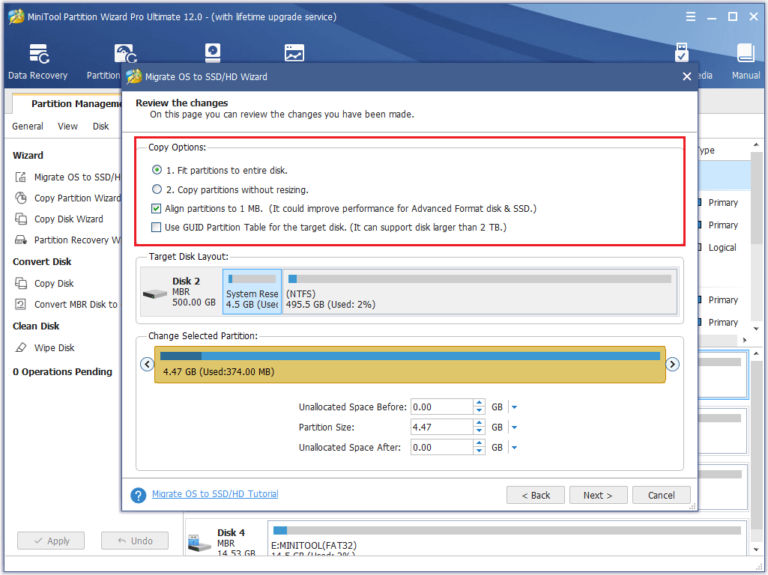
In this guide, we’ll show you how to put Windows 10 on a hard drive. It’s great for starting fresh or swapping out an old drive. By following these steps,…
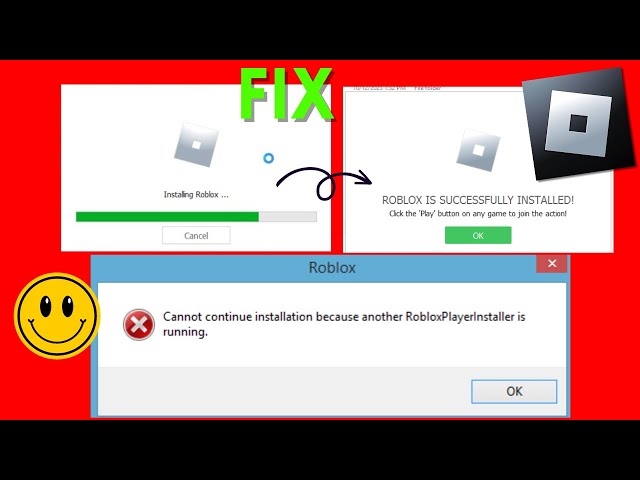
If you’re dealing with Roblox not installing on Windows 10, don’t stress. We’ve got solutions for you. Let’s get your game working perfectly. Checking Your Internet Connection If Roblox won’t…
If you’re keen to install Windows 10 on Ubuntu 22.04 and want a dual boot system, you’re in the right place. This guide will help you through each step. You’ll…
Installing Windows 10 on a new hard drive is simple and necessary. It helps move smoothly to the newest operating system. This guide is for those who have either bought…
Some apps on Windows 10 need the .NET Framework 3.5. Installing it usually needs an internet connection and takes time. This guide shows how to install .NET 3.5 on Windows…