Welcome to our easy guide on setting up Windows 10 offline. Whether it’s due to network troubles or a preference for offline setups, this tutorial has you covered. We’ll show you how to enjoy a smooth installation of Windows 10 without needing the internet.
Are you ready to begin? We’ll teach you how to install Windows 10 without an internet connection. You’ll learn everything from getting ready for the installation to choosing the right boot device. Finally, we’ll guide you through the offline installation of Windows 10.
Before starting, remember that no internet means some Microsoft services won’t be available. But if you prefer keeping your computer’s setup private, this method is ideal for you. So, let’s start with how to prepare, okay?
Before starting the offline installation of Windows 10, you must do a few important things. These steps will ensure that the installation goes smoothly. And you won’t need an internet connection.
Gather the Necessary Tools
A USB drive with at least 16GB of space is needed. You’ll use it to install Windows 10 on the computer you choose.
You also need a computer with internet to download what’s required for the offline installation.
Having a Windows 10 product key is helpful but not a must. Without one, you can still install, but you’ll have to enter a product key later.
Creating a Bootable USB Drive
To put Windows 10 on your chosen computer, you first need to make a bootable USB drive.
Start by getting the Windows 10 Media Creation Tool from Microsoft’s official site. Use a computer that can access the internet for this. This handy tool will help you make the USB drive you need for installation.
Once downloaded, run the tool and agree to the license terms it shows you.
Choose “Create installation media for another PC” to move forward.
Now, pick the language, edition, and system type (like 64-bit) that fit what you need.
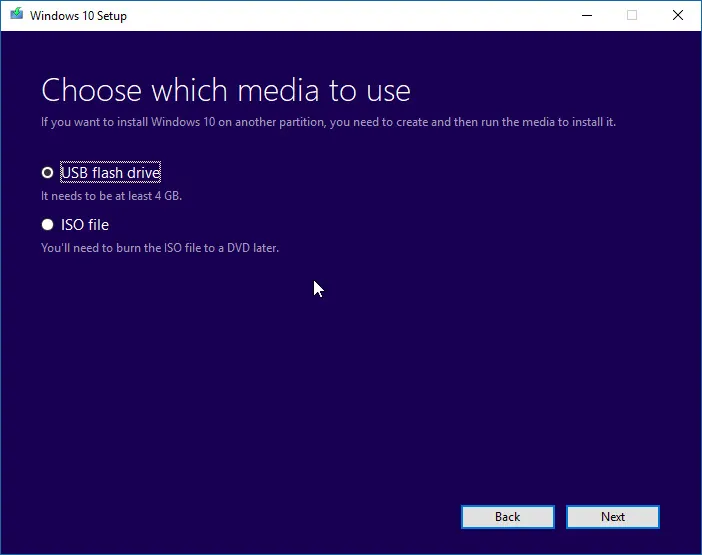
Then, select “USB flash drive” as the way you’ll install Windows.
Plug the USB drive into the computer and choose it as where you’d like the installation media saved.
Hit “Next” and wait as the tool downloads the necessary bits and creates your bootable USB drive.
You’ve now got everything ready for the offline installation and the USB drive set. You’re all set to install Windows 10 without needing the internet. The next steps will show you how to pick the right boot device to install smoothly.
Creating a Windows 10 installation media is a key step if you’re installing it without the internet. It lets you make a USB drive ready with everything needed for the setup. Here’s how to do it:
Download the Windows 10 Media Creation Tool from the official Microsoft website. Visit this link to access the download page.
After downloading, find the file and double-click to open the tool.
Click “Accept” to agree to the license terms when asked.
Select “Create installation media (USB flash drive, DVD, or ISO file) for another PC” on the following screen.
Choose your language, edition, and architecture. You can go with the suggestions or change them if needed.
Then, pick the USB drive as the destination. Make sure your USB has enough space (at least 16GB).
Hit “Next”. The tool begins to download files and prepares your USB drive.
When it’s done, you’ll have a Windows 10 installation USB ready for offline setup.
By doing these steps, you’ve made a Windows 10 installation media with the help of the Media Creation Tool and a USB. This lets you install Windows 10 offline, which is super handy for when there’s no internet connection.
Select the Correct Boot Device
When you want to install Windows 10 without being online, picking the right boot device is key. Here’s how to make the installation smooth:
Plug the USB with the Windows 10 setup into your PC. Check that it’s in properly.
Reboot your PC and open the BIOS menu. You usually press F12 as it starts, but it can vary. Check your PC’s manual or the maker’s site for the right key.
Go to the Boot section in the BIOS menu.
Find the setting to change the boot sequence. This decides the order your PC looks for something to boot from.
Put the USB at the top of the boot list. This makes sure your PC checks the USB first for Windows 10 setup.
Save your changes and leave the BIOS menu. Your PC will reboot now.
Choosing the right boot device and setting up the BIOS properly prepares you to install Windows 10 offline.
Install Windows 10 Without Internet
Installing Windows 10 without internet is simple. We’ll show you how to install it and set up the basics without the web. This includes choosing the right region and keyboard layout.
Get your Windows 10 setup ready and pick the boot device. Now, you’re set to install without internet.
Click “Install now” to start. The setup wizard will open.
If you have a Windows product key, type it in. If not, pick “I don’t have a product key” to keep going.
Choose the Windows 10 version you need and click “Next”.
Agree to the license terms by ticking the box, then click “Next”.
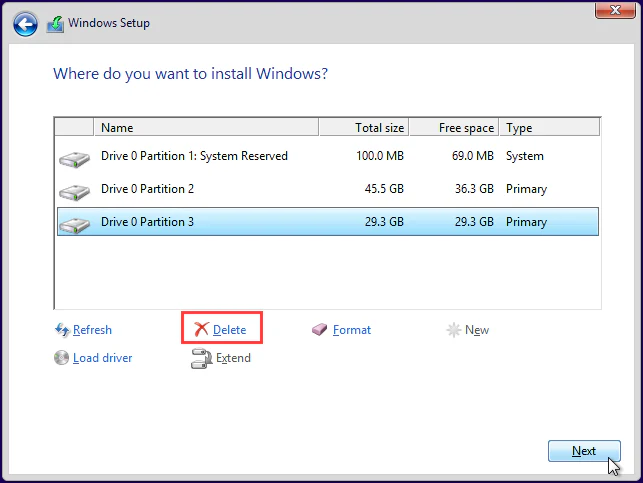
Select the partition for Windows 10. Click “Next”.
Wait for the installation to finish. It might take a while.
You’ll set the region and keyboard layout next. Pick the right ones and click “Next”.
In the network section, choose “I don’t have internet” and click “Next”. This skips network setup.
Follow the instructions on the screen. You’ll finish the setup and can use Windows 10 without the internet.
Step
Instructions
1
Click the “Install now” button
2
Enter the Windows product key (optional)
3
Select the operating system and accept license terms
4
Choose the partition for installation
5
Wait for the installation to complete
6
Set up region and keyboard layout
7
Select “I don’t have internet” in the network section
8
Complete the installation
Why Set up Windows 10 Without a Microsoft Account?
When you set up Windows 10, you can choose to create a Microsoft account or use a local account. Using a Microsoft account connects you to Microsoft services easily. But, there are good reasons to use Windows 10 without a Microsoft account.
Enhanced Control and Privacy
Using a local account gives you more control over your computer. You decide what info to share with Microsoft, protecting your personal data. It lets you tailor your settings and keep your information private.
Avoid Personal Info Sharing with Microsoft
If you set up Windows 10 without a Microsoft account, you share less personal info with Microsoft. This makes your computer use safer and more private. You’ll have better control over the info you give to Microsoft.
No Need to Remember Extra Passwords
A local account means you won’t need an extra password. It makes logging in simpler and decreases the chance of forgetting your credentials.
Use a Different Email Provider
Choosing not to use a Microsoft account lets you pick another email provider. Whether it’s Gmail or Yahoo, you can keep using your preferred email. It gives you the freedom to choose.
Limitations or Unavailability of Certain Microsoft Services
While using a Microsoft account offers certain perks, using a local account has drawbacks. You might miss out on services like OneDrive syncing and app installations from the Microsoft Store. It’s wise to think about the pros and cons before deciding.
Choosing to set up Windows 10 without a Microsoft account gives you more privacy and control. It frees you from extra passwords and lets you pick your email provider. Still, remember that this choice might limit access to some Microsoft services.
To grasp the differences between using Windows 10 with or without a Microsoft account, let’s explore the steps to set it up without one.
Benefits
Considerations
Enhanced control and privacy over your computer
Limitations or unavailability of certain Microsoft services
Avoid personal info sharing with Microsoft
No need to remember extra passwords
Use a different email provider
Step-by-Step Guide to Set up Windows 10 Without a Microsoft Account
Setting up Windows 10 without a Microsoft account is easy. It lets you have more control over your privacy and computer. By following simple steps, you can skip the Microsoft account. You can create or log in with a local account instead.
Accessing the Windows 10 Setup Screen
To start, turn on your computer. Let it boot to the Windows 10 setup screen. This appears if you’re installing for the first time or upgrading. Make sure you have a valid Windows 10 installation media before you start.
Choosing Installation Options
When you reach the setup screen, you’ll choose how to install. Pick the “Custom installation” option to move forward.
Customizing the Installation Settings
Next, you’ll get to customize your installation settings. Choose your language, time, and zone settings. You can also change privacy settings to control data sharing.
Completing the Installation Process
At the end, you’ll create or log in with a local account. When asked to “Sign in with Microsoft,” choose “Create account” or “Offline account”. Follow the prompts to finish setting up your account. Once done, Windows 10 will be installed without a Microsoft account.
By following these steps, you can install Windows 10 without a Microsoft account. This gives you more privacy and control. Remember, without a Microsoft account, some Microsoft services won’t be automatically available. Keep this in mind when deciding.
Conclusion
Setting up Windows 10 without the internet can be a good choice for many. It lets you use a local account, skipping the need for a Microsoft account. This gives you more control over your PC. You also share less personal info with Microsoft. Plus, you don’t need to remember extra passwords. You can even pick a different email provider.
Yet, going this route means you might miss out on some features. Certain Microsoft services may not be available. But if you still want those services, there are ways to use a Microsoft account. You can add one during installation or after setting up.
In the end, the choice is yours. You can install Windows 10 without the internet or use a Microsoft account. What matters most is what works best for you. Either way, you get to enjoy the perks of Windows 10. You stay in charge of your computer and keep your privacy safe.
FAQ
How can I install Windows 10 without an internet connection?
For an offline install, get ready first. Create a Windows 10 installation media. Then, choose the right boot device. Finish the setup without being online.
What preparation is required for an offline installation of Windows 10?
You’ll need a USB drive, at least 16GB. Plus, a computer that works. A Windows 10 product key is optional.
How can I create a Windows 10 installation media?
First, download the Windows 10 Media Creation Tool. Run it. Accept the terms. Choose to create media. Pick your language and settings. Use a USB as the media. Then, wipe and repartition it.
How do I select the correct boot device for installing Windows 10 without internet?
Plug the USB into your computer. Hit F12 to get to the BIOS menu. In Boot settings, make the USB top priority.
What are the steps to install Windows 10 without an internet connection?
Start with “Install now”. Enter a product key if you have one. Choose the OS, accept the terms. Pick where to install. Wait for it to finish. Set your region and keyboard. Choose “no internet”. Just follow the prompts to finish.
What are the benefits of setting up Windows 10 without a Microsoft account?
Without a Microsoft account, you get more control and privacy. You won’t have to share your info with Microsoft. No extra passwords to remember. Plus, use any email you want. Some Microsoft services might not work, though.
How can I set up Windows 10 without a Microsoft account?
Go to the setup screen. Opt for a custom install. Skip networking. Set up or log into a local account. You can pick your settings like language and privacy. Then, finish setting up.
What are the main benefits of installing Windows 10 without an internet connection and using a local account?
This way, you get better control and privacy on your PC. No need to share details with Microsoft. Forget about extra passwords. Choose any email service you like. There are other ways to set up Windows 10 without a Microsoft account, too.
When you’re installing Windows 10 from a USB drive, you might face some problems. These include physical issues with the USB, wrong formats, and EFI/UEFI setup troubles. Other common troubles…
Welcome to our guide on installing Windows 10 on a new hard drive. This guide is perfect whether you’re building a new PC or upgrading an old one. We’ll show…
Microsoft has stopped supporting Windows 7. However, you might still need to use it. Creating a Windows 7 virtual machine on Windows 10 can solve this problem. This process lets…
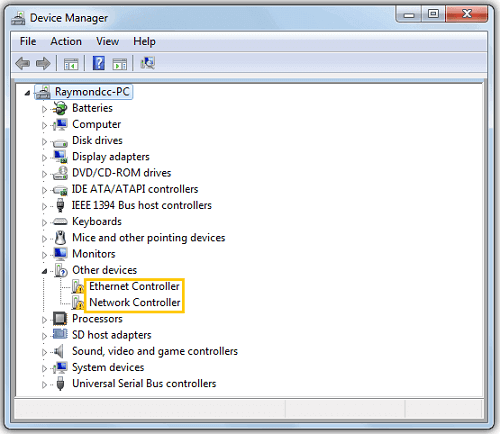
If your PC lacks network drivers, you won’t have internet access. There are two ways to tackle this. First, download and install the driver from the manufacturer’s website using another…
Do you want to put Windows 7 on your Windows 10 computer? We will show you how to use both Windows 7 and Windows 10 together. This guide covers everything…
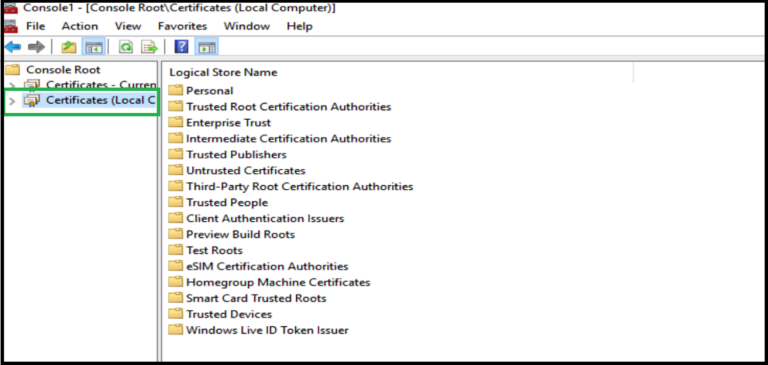
Securing your Windows 10 system is crucial, and a digital certificate is key. This certificate ensures safe communication between your browser and websites. It keeps your info safe and fends…