Welcome to our guide on installing Jira in Windows 10. Jira is a powerful tool for project management. It boosts teamwork and makes workflows smooth. This guide will help you install Jira on your Windows 10 machine, step by step.
First, make sure Windows 10 can run Jira. Check the Supported platforms page for your Jira version to see if it’s compatible. Remember, Jira won’t work on OSX or macOS.
Jira includes Java (JRE) and Tomcat, so you don’t need extra installations. To have Jira run as a Windows Service, start the installer as an administrator. It’s a good idea to use a dedicated user account for Jira. Also, set up an external database like PostgreSQL.
Before you start installing, check if you have a valid Data Center license. You need it for Jira Software, Jira Core, or Jira Service Management. It’s key for a successful setup and use.
Now you’re ready to install. The next parts of this guide will cover the download, database connection, and setup. We’ll give tips for troubleshooting too, in case you hit any snags.
By the end of this guide, you’ll have Jira running on your Windows 10 computer. Your team’s project management will be better than ever. Let’s dive in!
To start with Jira, first download it from the official Atlassian website. You can pick from Jira Core, Jira Software, or Jira Service Management. Just go to the Atlassian site and choose what you need.
After selecting, make sure you pick the installer that works with Windows 10. This makes installing it easy and ensures it runs well.
When the download is done, run the installer as an administrator. This is crucial for a smooth setup. It makes sure all the needed files and settings are correctly installed on your Windows 10 computer.
In short, getting Jira is easy. Visit the Atlassian site, select the right version, grab the Windows 10 installer, and run it with admin rights. Doing this prepares you for a great start with Jira, helping your team manage projects better.
Running the Installer
To install Jira on your Windows 10 machine, it’s key to follow the right steps. Firstly, make sure you run the Jira installer as a Windows administrator. This gives you the needed rights to smoothly go through the installation.
Next, when you start the Jira installer, follow the prompts carefully. You’ll have to pick where to install Jira and where to store your data. Take your time to decide on these directories, so they’re easy to reach and fit what you need.
If you don’t have special needs, using the default TCP ports is usually okay. But if these ports are busy with other apps, choose a free port or adjust the settings. This prevents any issues.
Also, think about if you want Jira to run as a service. If yes, be sure you’re an admin on your Windows machine. Choose the service install option during setup. This will let Jira start up with your PC, making things run smoothly.
By accurately following these steps, installing Jira on your Windows 10 becomes simple. You’ll be ready to manage projects and work with your team effectively.
Connecting to a Database
When you set up Jira for production, you’ll need a separate database. Look at the Supported platforms page for your Jira version. This gives you a list of databases you can use.
PostgreSQL is a good choice if you don’t have a database yet. It’s free, simple to set up, and works well with Jira.
Before installing, make sure your database is ready. Use the UTF-8 encoding to handle text in different languages properly.
If you’re using Oracle or MySQL, download the necessary drivers. This connects Jira to your database.
The H2 database that comes with Jira is okay for trying things out. But it’s wise to switch to an external database for real work.
Supported Databases for Jira
Here are some databases Jira works with:
Database
Version
PostgreSQL
9.5 or later
MySQL
5.7 or later
Oracle
12c or later
Microsoft SQL Server
2014 or later
Remember, the version of your database server might need special setup. Check the database’s guide to make sure everything works smoothly.
Connecting Jira to a supported database ensures your team’s work is on a strong platform.
Licensing Jira
To use Jira, you need a valid license. Specifically, a Data Center license for Jira Software, Jira Core, or Jira Service Management is necessary. If you haven’t bought a license yet, you can get an evaluation license during setup. This lets you test Jira’s benefits before buying a full license.
If you already have a license key, you can find it on the easy-to-use my.atlassian.com platform. You can also enter the license key manually when setting up.
Switching from Jira Cloud to the on-premises version means you’ll need a new license. This ensures a smooth transition.
Licensing Type
Description
Data Center License
A valid license for organizations using Jira Software, Jira Core, or Jira Service Management.
Evaluation License
A temporary license that allows users to test Jira’s functionality and features before committing to a full license.
License Key
The unique identifier that grants access to Jira’s full range of capabilities.
Setting Up Jira Application
After installing Jira, it’s time to configure it. Here’s how to begin:
I. Choose the Set Up Method
Choose “I’ll set it up myself” when asked. This starts the manual set-up.
II. Connect to the Database
For database connection, provide all needed info during setup. This includes database type, hostname, port, database name, and login details. Check your database guide for accurate info.
III. Configure Application Properties
Next step: adjust application settings. This covers:
Naming your Jira site to tell it apart.
Changing privacy settings to control access.
Setting the base URL to ensure Jira’s links work.
IV. Enter Your License Information
Now, add your Jira license key. If you have an evaluation license, get it now.
V. Create the Administrator Account
Create an admin account for total Jira control. Provide username and password to set it up.
VI. Configure Email Notifications
Enter mail server details for Jira email alerts. Include SMTP address, port, login details, and specific server configurations.
Additional Tips:
If you hit a snag, check Atlassian’s official guides for help. Make sure your database is right for Jira, to keep it running smooth.
Troubleshooting and Tips
If you hit problems while setting up Jira, like antivirus issues, follow these steps for a smoother setup.
Disable antivirus interference: Antivirus or internet security tools can disrupt the installation. Temporarily turn them off. This stops conflicts and lets the installation run smoothly.
Refer to Jira installation troubleshooting resources: For detailed help with installation issues, check the Jira installation troubleshooting guides on Atlassian’s site. They give clear instructions to fix common problems.
Ensure proper system requirements: Make sure your system can run Jira before installing it. Confirm that your operating system, CPU, and memory are all compatible with Jira’s version.
Allocate enough memory and CPU resources: For the best Jira performance, make sure there’s enough memory and CPU power. How much you need varies with your organization’s size and user count.
Separate service directories from the operating system drive: Separating service directories from the OS drive avoids conflicts. It gives Jira its own data storage and lowers performance issue risks.
Keep your database and Jira nodes on separate systems for Data Center installations: For Data Center setups, have your database and Jira on different systems. This spreads out the load, improving performance and reliability.
Jira troubleshooting and tips can solve common setup challenges. They make your Jira setup more efficient for managing projects.
For more help or other issues, don’t hesitate to contact Atlassian support. They offer expert advice.
Conclusion
Installing Jira on Windows 10 is quite simple but needs you to be careful. You must look at the system requirements, set up the database, manage the license, and configure the app correctly. By following this guide, you’ll be able to get Jira working on your Windows 10 machine. This will help your team manage projects more efficiently.
This guide has covered crucial parts like downloading Jira, running the installer, and connecting to the database. We also talked about licensing Jira and how to set up the application. Every step is important for a smooth installation and to make sure Jira works well.
If you need more help, check out the official Atlassian resources. On the Atlassian website, you can find detailed documentation, guides for troubleshooting, and a community forum. Here, you can get advice from others who use Jira.
FAQ
Can I install Jira on Windows 10?
Yes, you can install Jira on Windows 10. Ensure you use a supported operating system. Also, follow the steps in the setup guide.
Do I need to install Java and Tomcat separately for Jira?
No, you don’t. Jira includes Java (JRE) and Tomcat. So, separate installations are unnecessary.
How do I run the Jira installer as an administrator?
To run the Jira installer as an admin, right-click the installer file. Then choose “Run as administrator” from the menu.
Should I create a dedicated user account for running Jira?
Yes, creating a dedicated user account for Jira is wise. It boosts security and ensures Jira works well.
What external database should I use for Jira?
PostgreSQL is the recommended external database for Jira. It’s free, simple to set up, and works well with Jira. You can choose other supported databases from the setup guide too.
Do I need a license to use Jira?
Yes, a valid Data Center license is needed for Jira Software, Jira Core, or Jira Service Management. You can get an evaluation license during setup if you don’t have one.
How do I set up Jira application?
For setting up Jira, pick the “I’ll set it up myself” option at install. Connect to your database, enter license info, and set application properties. Also, create an admin account and configure email alerts then.
What should I do if I encounter issues during the Jira installation process?
If installation issues arise, like antivirus blocks, turn off the antivirus or security tool briefly. Check the Jira installation troubleshooting guide for more help.
Are there any tips for a successful Jira installation?
For a smooth Jira installation, ensure your system meets all requirements. Allocate enough memory and CPU. Keep service directories and operating system drive separate. Place your database and Jira nodes on different systems for Data Center versions.
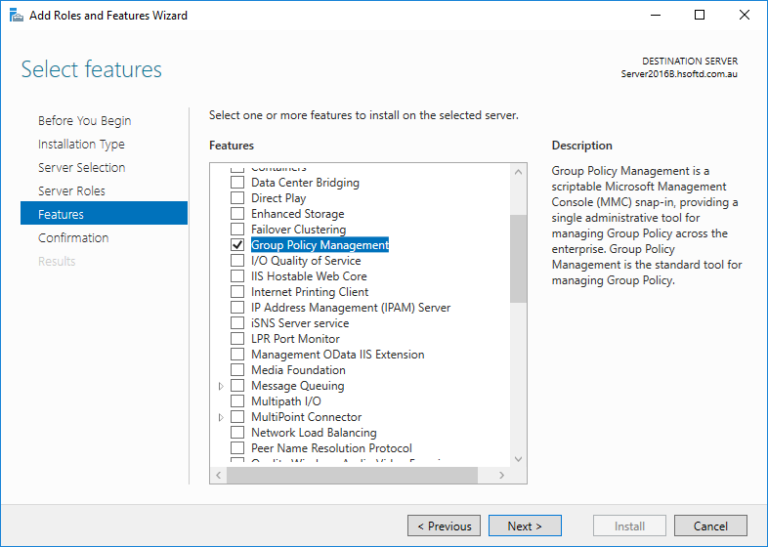
The Group Policy Management Console (GPMC) is a strong tool for Group Policy management on Windows. To set it up on a Windows 10 device, here are the steps: System…
The Malwarebytes offline installer lets you install Malwarebytes on Windows 10 easily. It doesn’t need an internet connection. This means you can get protected against malware threats without interruptions. You…
Boost your image viewing on Windows 10 by getting the HEIC codec. It lets you see and use HEIF/.heic files smoothly in apps like Photoshop. You’ll manage images better. To…
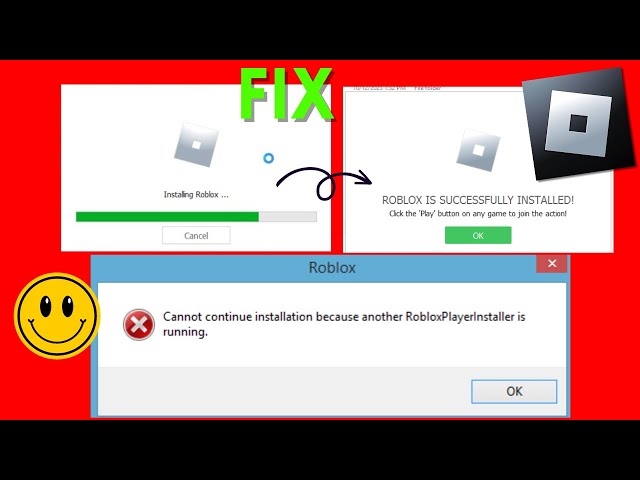
If you’re dealing with Roblox not installing on Windows 10, don’t stress. We’ve got solutions for you. Let’s get your game working perfectly. Checking Your Internet Connection If Roblox won’t…
This guide will show you how to install Windows 10 on your Chromebook without a USB drive. Although direct installation of Windows 10 on a Chromebook using a USB isn’t…