To install macOS Ventura on VirtualBox running on Windows 10, follow our easy guide. This guide will show you each step needed for a smooth installation. Whether you’re doing a clean install on a compatible device or using OpenCore Legacy Patcher on an older Mac, VirtualBox lets you run macOS Ventura on a Windows PC.
VirtualBox
, and
Windows 10
are essential for getting macOS Ventura to work on your Windows PC. Follow this guide, and you’ll be able to use macOS Ventura’s features and functions, all without a Mac.
A Windows computer running Windows 11/10/8.1/7 with at least 8GB of RAM
A disk with a minimum of 20GB of free storage for macOS Ventura
Download the macOS Ventura ISO file to create an ISO file for installation
Gathering the right tools is key for a smooth installation. Your Windows computer must have enough RAM and disk storage.
Don’t forget to download the macOS Ventura ISO file. You’ll need it to create the installation media. This file is crucial for installing macOS Ventura on your VirtualBox setup.
Having a Windows computer with at least 8GB of RAM is important. It ensures good performance while installing and using macOS Ventura on VirtualBox. Also, make sure you’ve got enough disk storage for all your files and data within macOS Ventura.
After checking that your Windows computer has all the prerequisites and downloading the macOS Ventura ISO file, you’re all set for the installation. The following part will show you how to set up VirtualBox and the Extension Pack.
Preparations for installation
Prerequisites
Details
Windows computer
Windows 11/10/8.1/7
RAM
Minimum 8GB
Disk storage
Minimum 20GB of free space
macOS Ventura ISO file
Downloaded for installation
Installing VirtualBox and the Extension Pack
To set up macOS Ventura on VirtualBox, we start with two key steps. First, get VirtualBox and the Extension Pack installed. Here’s how:
Download VirtualBox and the VirtualBox extension pack from the official VirtualBox website.
Install VirtualBox by running the installer and following the on-screen instructions.
Install the VirtualBox Extension Pack by opening VirtualBox, going to Preferences, selecting the Extension tab, and clicking on the add icon to locate and install the Extension Pack.
The Extension Pack is key. It makes sure your mouse and keyboard work right while installing.
Note: The image above shows how VirtualBox and the Extension Pack are installed.
Creating a virtual machine for macOS Ventura
To make a virtual machine for macOS Ventura, you’ll need VirtualBox and the Extension Pack. Here’s what to do:
Start VirtualBox on your Windows PC.
Press the New button at the top to make a new virtual machine.
Name it “macOS Ventura” and keep the other settings as they are.
Boost the memory size to the highest possible and move on with the setup.
Make a new virtual hard disk in VMDK format. Decide on the size for your files and data for the macOS Ventura.
By doing these steps, you can set up a virtual machine for macOS Ventura. It lets you run macOS Ventura smoothly on your Windows PC.
Virtual machine settings
When you make the virtual machine, choosing the right settings is key for the best performance. Here are important settings to adjust:
Memory size: Boost the memory size to the max to make macOS Ventura run well.
Virtual hard disk: Make a virtual hard disk in VMDK format. Give it enough space for your files and data during the macOS Ventura process.
Tweaking these settings helps craft a virtual machine that works well with macOS Ventura.
Making a virtual machine for macOS Ventura is a vital step. It means you can have a special environment for macOS Ventura on your Windows PC. By following the steps and adjusting settings as needed, you’re set for a smooth macOS Ventura experience.
Setting up the virtual machine for macOS Ventura
Before you begin installing macOS Ventura on your virtual machine, some key settings must be tweaked. Here are the steps you should follow:
Open the settings for the newly created virtual machine: After setting up the virtual machine for macOS Ventura in VirtualBox, go to its settings menu.
Allocate maximum available base memory: In the Motherboard section, max out the memory for better performance of macOS Ventura.
Optimize processor settings: Go to the Processor section and bump up the processors to four. This boosts macOS Ventura’s operation.
Allocate maximum video memory: In the Display area, max out the video memory for smoother graphics in macOS Ventura.
Assign the macOS Ventura ISO file: In Storage, pick an empty disk slot and choose the macOS Ventura ISO file as the boot disk.
Enable USB 3.0 controller: In the USB section, turn on the USB 3.0 (xHCI) controller. This enables support for fast USB devices.
By tweaking these settings for your virtual machine, macOS Ventura will run smoothly on VirtualBox. This enhances your overall experience.
Explore the optimized virtual machine settings for macOS Ventura:
For the best macOS Ventura performance on your virtual machine, consider these optimized settings:
Settings
Recommendation
Memory Allocation
Max out the virtual machine’s memory.
Processor Settings
Boost the number of processors to 4 for the best performance.
Video Memory
Max out video memory for smooth graphics.
Storage Settings
Use the macOS Ventura ISO file as the virtual machine’s boot disk.
Installing macOS Ventura on VirtualBox
Now you are ready to install macOS Ventura on VirtualBox. Follow these steps:
Select the macOS Ventura ISO file you downloaded. Open it in VirtualBox.
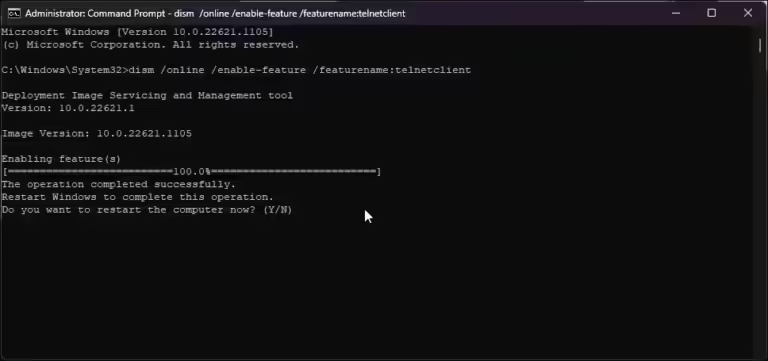
Launch Command Prompt as an administrator.
In Command Prompt, paste the command lines we provide. Replace “macOS 13” with your virtual machine’s name. This will fix limitations and prevent errors.
Open VirtualBox and choose the macOS Ventura virtual machine.
Start the virtual machine and follow the instructions on the screen. Wait for installation to finish.
After installing, you can use macOS Ventura on your Windows computer. Just open VirtualBox.
About the Installation Process
The installation uses the macOS Ventura ISO file to make a virtual machine on VirtualBox. Command lines are used to get around VirtualBox’s limits and make installation smooth.
Command Lines
Command lines are commands for Command Prompt. They help you do certain tasks. For macOS Ventura installation, they help avoid VirtualBox’s limits and let you install successfully.
Note: Remember to use your virtual machine’s name instead of “macOS 13”.
Here’s an image showing how macOS Ventura is installed on VirtualBox:
Conclusion
Congratulations! You’ve successfully followed our guide to install macOS Ventura on your Windows 10 PC. Now, you can enjoy new features and improvements. VirtualBox lets you experience macOS Ventura’s capabilities without needing a Mac.
Share your journey with others. Let more Windows users know about running macOS Ventura through VirtualBox. Together, we can make computing more inclusive for all.
Are you excited to try new productivity tools or the sleek macOS Ventura interface? This guide has made it possible. Enjoy macOS Ventura on your Windows PC and discover new workflow possibilities.
FAQ
What are the prerequisites for installing macOS Ventura on VirtualBox running on Windows 10?
For installing macOS Ventura, your Windows computer should have at least 8GB of RAM. It needs 20GB of free space. Also, download the macOS Ventura ISO file for the setup.
How do I install VirtualBox and the Extension Pack?
To get VirtualBox and the Extension Pack, download them from the official VirtualBox website. Install VirtualBox by running the installer and following instructions. After installing, open VirtualBox. Go to Preferences and the Extension tab. Add the Extension Pack there. It helps with mouse and keyboard use.
How do I create a virtual machine for macOS Ventura?
To make a virtual machine for macOS Ventura, start VirtualBox on your PC. Click ‘New’ at the top. Name it “macOS Ventura” and keep the default settings. Boost the memory to the max. Then, make a new virtual hard disk in VMDK format. Set the size you want for storing files.
What virtual machine settings do I need to modify for macOS Ventura?
Before installing macOS Ventura, adjust some settings. First, open your virtual machine’s settings. In the Motherboard tab, give it the most base memory you can. Go to the Processor tab and set processors to 4 for better performance. In the Display tab, max out the video memory. This makes the graphics run smoothly. Then, in the Storage tab, choose an empty disk. Assign the macOS Ventura ISO file as the boot disk. Finally, enable the USB 3.0 (xHCI) controller in USB settings.
How do I install macOS Ventura on VirtualBox?
To install macOS Ventura, open the downloaded ISO file in VirtualBox. Run Command Prompt as an admin. Copy and paste the given commands, using your virtual machine’s name. This helps bypass VirtualBox’s limits, ensuring a smooth installation. Then, start your virtual machine in VirtualBox. Follow the instructions on-screen. Once installed, you can enjoy macOS Ventura on your Windows PC by launching VirtualBox.
Can I install macOS Ventura on VirtualBox on Windows 10?
Yes, by following the provided steps, you can install macOS Ventura on VirtualBox on Windows 10. This lets you use macOS Ventura’s new features on a Windows PC without having a Mac.
Many people wonder how long it takes to install Windows 10. The time needed can change due to different factors. We’ll look at these reasons in this article. The installation…
If you’re finding it tough to install Windows 10 Update 22H2, know that you’re not the only one. Installation troubles are a pain, but there’s no need to worry. We…
Learn how to install and enable Telnet on Windows 10 for remote access and fixing network problems easily. Use the command prompt or GUI. Telnet is an important network protocol….
This guide will show you how to install Windows 10 on your Chromebook without a USB drive. Although direct installation of Windows 10 on a Chromebook using a USB isn’t…
Do you want to put Windows 7 on your Windows 10 computer? We will show you how to use both Windows 7 and Windows 10 together. This guide covers everything…
Boost your image viewing on Windows 10 by getting the HEIC codec. It lets you see and use HEIF/.heic files smoothly in apps like Photoshop. You’ll manage images better. To…