Welcome to our guide on installing Windows 10 on a new hard drive. This guide is perfect whether you’re building a new PC or upgrading an old one. We’ll show you how to install the latest Windows on your new hard drive.
First, you need to create a Windows 10 installation media. This can be a DVD or USB drive. We’ll walk you through the steps. Remember to unplug other drives to avoid deleting their data accidentally.
With your installation media ready, boot from it to start. You’ll choose the language, input your license key, and select the installation type. Picking the right drive for installation is key to avoid losing data.
Next, you will format the chosen drive. Then, Windows 10 installs onto your new hard drive. Remember, formatting deletes all data on the drive. So, back up important files first.
Now you know the basics of installing Windows 10. Next, we’ll delve deeper. We will discuss creating Windows 10 installation media, getting your new hard drive ready, fixing any issues, and other ways to install.
Creating a Windows 10 Installation Media
To get Windows 10 on a new hard drive, you need to make an installation media. This can be a DVD or a USB drive with Windows 10 on it.
You can make a Windows 10 installation media in a few ways:
- Using the Media Creation Tool:
- Downloading ISO files:
The Media Creation Tool from Microsoft is easy to use for making a Windows 10 media. Just download the tool from Microsoft’s site and follow the steps. You can make a DVD or a bootable USB stick.
Another way is to get the Windows 10 ISO files from Microsoft’s site. After downloading, you can use tools like ImgBurn or Rufus. They help you burn the ISO files onto a DVD or make a USB stick bootable.
Choose the right option for a DVD or a USB drive.
Once your media is ready, you can install Windows 10 on your new hard drive.
Preparing the New Hard Drive
Before you can install Windows 10 on your new hard drive, you must get it ready. This means carrying out a few important steps to help the installation go smoothly.
-
Installing the New Hard Drive
First, you need to physically put the new hard drive into the computer. This involves opening the case and attaching the right cables. It could be SATA or IDE cables. Make sure to mount the drive well in the bay. Always use the guide from the manufacturer or check your computer’s manual to do it right.
-
Recognizing the New Hard Drive
Once the hard drive is in, make sure your computer sees it. To do this, go into the BIOS when your computer starts. Look for a section named “Storage” or “Drives” and check that the new hard drive shows up. If it doesn’t, double-check your cable connections. You might also need to look at the computer’s manual or visit the manufacturer’s website for help.
-
Formatting the Drive
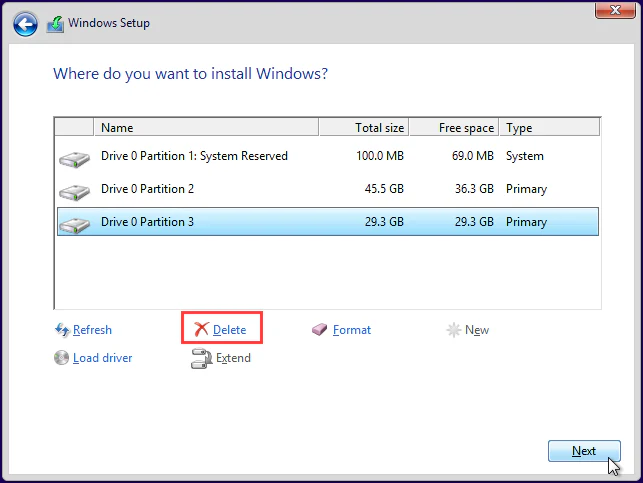
When the system sees your new hard drive, it’s time to format it. This means wiping any old data and making it ready for Windows 10. This step ensures the drive works well. Windows 10 will give you the option to format during installation. Make sure you choose the right drive to format and get it ready for the new installation.
-
Partitioning the Drive
You might want to split your new hard drive into sections, called partitions. This is good for organizing different types of data or for multiple operating systems. During the setup of Windows 10, you can choose to create these partitions. Follow the steps shown on your screen to set up partitions the way you need. Be sure to leave enough space unallocated for the installation. Think carefully about how much space you allocate to each partition.
To successfully install Windows 10 on your new hard drive, follow these steps. Check that the drive is recognized, format it, and partition it as needed. This will make the installation tidy and well-organized.
Installing Windows 10 on the New Hard Drive
Once you’ve got the new hard drive ready, it’s time to install Windows 10. The installation is quite simple if you follow the steps.
First, start your PC using the Windows 10 installation media. This could be a DVD or a USB with the installer.
Then, the installation wizard guides you on the screen. You’ll pick your language, enter the license key, and choose the installation type.
Picking the custom installation gives you more control. It lets you pick the drive and set up partitions yourself.
Next, you have to choose the new hard drive for Windows 10. Making the right drive choice is crucial to avoid losing data.
After choosing the drive, you have the option to format it. This step clears the drive and gets it ready for Windows 10. Be sure to back up any important files first.
Once the drive is formatted, Windows 10 starts installing. Just follow what the screen says to finish up.
To wrap it up, installing Windows 10 on a new hard drive is easy with these steps. Have your license key ready, opt for the custom installation for full control, and double-check your drive choice to prevent data loss.
Updating Windows 10 on the New Hard Drive
After installing Windows 10 on a new hard drive, it’s important to update it. Updates make sure your system is secure, steady, and has the newest features. Here’s how to update Windows 10:
- Open the Start menu and click on Settings.
- In the Settings menu, select Update & Security.
- Click on Windows Update in the left sidebar.
- Click on the Check for updates button to look for new updates.
- If any updates are found, click Download and install to start the update. A solid internet connection is needed for smooth downloading and installation.
- The system will download and install the updates automatically. You may need to restart to complete the installation.
By updating Windows 10, your computer becomes more secure and performs better. Besides updating the operating system, updating hardware drivers is crucial too. Drivers allow your hardware to communicate effectively with your operating system.
Here’s how to update your drivers in Windows 10:
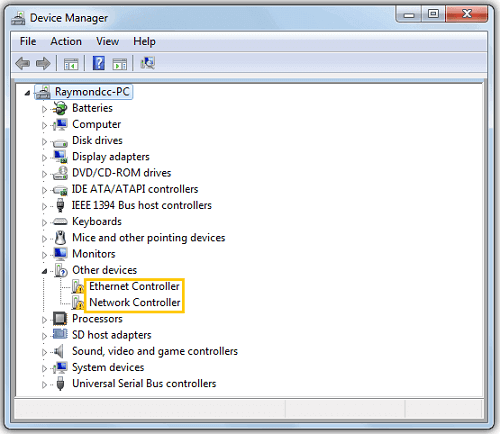
- Open the Start menu and click on Device Manager.
- In Device Manager, find the hardware you want to update. Right-click and choose Update driver.
- Select Search automatically for updated driver software. Windows 10 will find and install the newest drivers by itself.
- Do this for each piece of hardware to keep your drivers current.
Keeping your drivers up to date helps your hardware work perfectly with Windows 10.
After updating your system and drivers, you might want to add more software. You might need tools for work, security software, media players, or programs for creating graphics. To add software to your Windows 10:
- Download the software from its official website or a reliable source.
- Find the downloaded file and double-click to start setting it up.
- Follow the steps in the installation wizard to install your software.
- After installing, open the software to adjust its settings to what you like.
The picture above shows how to update Windows 10. This ensures your new hard drive runs smoothly and safely.
Troubleshooting Installation Issues
Sometimes, people face problems when installing Windows 10 on a new hard drive. These can be compatibility issues, errors during installation, or driver clashes. Here are steps to fix these problems:
1. Check System Requirements
First, make sure your computer fits the basic needs for Windows 10. Check the processor, RAM, and storage are right. If your computer doesn’t match these, the installation might not work.
2. Verify Hardware Compatibility
Next, check if your computer parts, like the motherboard and graphics card, work with Windows 10. Look at the makers’ websites for the latest Windows 10 driver updates. Old drivers can lead to errors.
3. Update Drivers
Then, get the newest Windows 10 drivers for your parts from their websites. This helps fix compatibility problems and improves performance. Remember to restart your computer after updating the drivers.
4. Disconnect External Devices
Remove any external devices like printers or USB drives when installing. They might stop the installation from working right. Plug them back in after Windows 10 is installed.
5. Consult Microsoft Support
If you’re still having trouble, it’s a good idea to get help from Microsoft support. They can offer advice on fixing specific errors. This can help solve your installation problems.
To get past common installation problems and install Windows 10 successfully, follow these suggestions. If issues keep happening, getting help from an expert might be the best way to ensure everything goes smoothly.
| Common Installation Errors | Possible Causes | Resolution |
|---|---|---|
| Error 0x8007045D | Corrupted installation media | Try using a different USB drive or DVD for installation |
| Error 0x80070020 | Conflicting software or antivirus blocking installation | Temporarily disable antivirus software and close all unnecessary programs before proceeding with the installation |
| Error 0x80070570 | Hardware issues or faulty RAM | Check the hardware for any issues and ensure the RAM is functioning correctly |
Alternative Methods for Installing Windows 10 on a New Hard Drive
Besides the standard way, there are other methods to put Windows 10 on a new hard drive. These ways are flexible and meet different needs and wants. Let’s look at some of them:
Migrating Windows 10
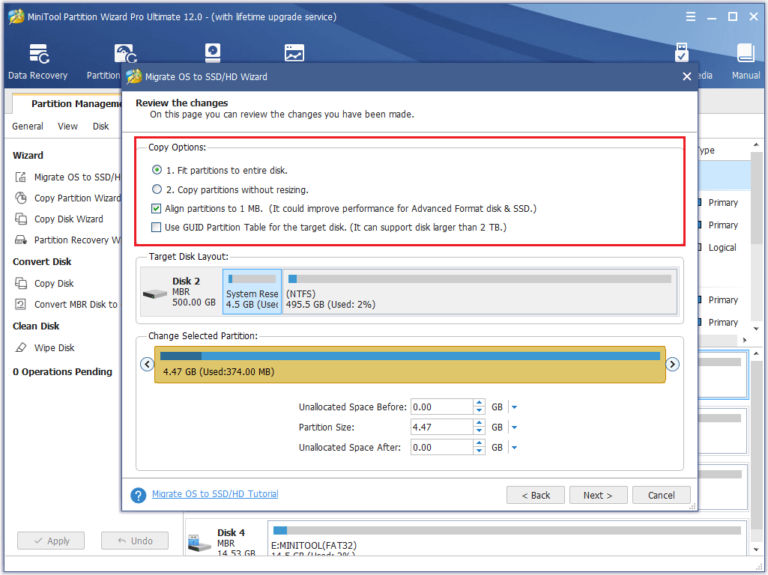
A different way to get Windows 10 on a new hard drive is to move it from an old drive. This lets users keep all their stuff, like apps, files, and settings, on the new hard drive. So, there’s no need to reinstall it all.
For moving Windows 10, tools like EaseUS Todo PCTrans or Paragon Drive Copy are used. They help move everything smoothly to the new hard drive. But, moving Windows 10 needs tech knowledge and care to do it right.
Cloning Windows 10
Cloning is another method where you make a copy of your current drive to the new hard drive. It means the operating system, apps, and data all get copied. This is great for keeping everything just as it is on the new drive.
Software like Macrium Reflect or Acronis True Image helps with cloning. They’re easy to use and guide you step by step. When cloning, it’s key to think about the space and if the old and new drives work well together.
Specialized Migration Tools
There are also specific tools for moving to a new hard drive. These tools do things special for your needs, making Windows 10 setup on the new hard drive just right for you.
Tools like Laplink PCmover help move apps, files, and settings easily. They’re great for moving to a new computer or from an old Windows to Windows 10.
Zinstall WinWin is good for moving apps. It makes sure everything needed moves too, so there are no issues.
These special tools help with putting Windows 10 on a new hard drive easily. But, it’s key to pick the right tool for what you need and that works with your setup.
Even though these other ways can save time, they might need extra software or tech skills. Always check what you need and can do before choosing these methods to make sure it goes well.
Conclusion
Putting Windows 10 on a new hard drive is quite easy. Just follow some simple steps. First, create Windows 10 installation media and get the hard drive ready. This will let you install Windows 10 and use its features.
Make sure you pick the right drive when installing to prevent losing data. After installation, update Windows 10. Also, install any needed drivers and software to make it work its best. If you run into problems, there are ways to fix them. You can also look into other ways to install if needed.
FAQ
How do I create a Windows 10 installation media?
To create a Windows 10 installation media, you have two options. You can use a DVD with the Windows 10 installer or a USB drive. Use the Media Creation Tool from Microsoft or download the ISO files. Then, you burn them to a DVD or create a bootable USB drive.
How do I prepare the new hard drive for Windows 10 installation?
Before installing Windows 10, check that the new hard drive is properly installed. It should be recognized by the system. Format the drive to clear existing data and create necessary partitions. Windows 10 installation will allow you to format and partition the drive.
How do I install Windows 10 on the new hard drive?
Boot from the Windows 10 installation media to start. Follow the on-screen instructions carefully. Choose the language, input the license key, and select the custom installation option.
This gives you full control over drive selection and partitioning. After picking the new hard drive for installation and formatting it, Windows 10 will start installing.
How do I update Windows 10 on the new hard drive?
Once Windows 10 is installed, update it to the latest version. Run Windows Update to get any available updates. Remember to install drivers for your computer’s hardware. This ensures everything works correctly. Also, installing required software will personalize your Windows 10 setup.
What should I do if I encounter issues during Windows 10 installation on a new hard drive?
If you face issues, first ensure your PC meets Windows 10 system requirements. Check hardware compatibility and update your drivers. If problems continue, seek help from Microsoft support or a technical expert.
Are there alternative methods for installing Windows 10 on a new hard drive?
Yes, you can try different methods to install Windows 10 on a new drive. Options include migrating or cloning Windows 10. There are specialized tools for this. These methods are helpful if you wish to move your current Windows 10 setup. Note that they might need extra software or technical skills.
