Learn how to install and enable Telnet on Windows 10 for remote access and fixing network problems easily. Use the command prompt or GUI. Telnet is an important network protocol. It lets you communicate and connect with devices from afar, helping both network pros and fans.
Telnet is an old client-server protocol. It was around before the TCP/IP protocol we often use. It allows someone to log into a different computer. This is possible if both are on the same network. They connect through TCP/IP. The Telnet protocol opens a path for communication. It does this through a virtual terminal connection. It sends data and Telnet control info over TCP. Unlike other protocols, Telnet gives you a login screen. This lets users log in as if they are actually using the remote device.
To grasp how Telnet operates, let’s dissect it:
Telnet Protocol
The Telnet protocol is a network protocol that creates a way for remote communication. It sets up a client-server structure. This structure allows for the sending and receiving of information.
Client-Server Architecture
In the Telnet setup, the client is often the user’s computer. It connects with a server. This server is the remote device the user aims to access. This setup lets the user command the remote device from their own computer.
With Telnet, the user’s computer forms a virtual terminal connection to the remote device. This virtual terminal lets users send commands and get responses. It’s like being physically connected to the remote device.
TCP/IP Connection
Telnet uses the TCP/IP connection to link the client and server. This ensures the data sent is reliable and correct. It helps in giving users a smooth experience.
In summary, Telnet lets users remotely log into a device on the same network. They interact with it through a virtual terminal connection. This protocol is used in system admin, network troubleshooting, and remote access.
Next, we’ll look into enabling Telnet on Windows 10. This will allow us to use its features for remote access and fixing network issues.
How to Enable Telnet on Windows 10
Telnet is not enabled by default in Windows 10. You have two ways to turn it on: using the GUI or command prompt.
GUI Method
To enable Telnet via the GUI, do the following:
Go to the Programs and Features in Control Panel.
Hit Turn Windows features on or off.
Find the Telnet Client option.
Choose the Telnet Client option.
Press OK.
Command Prompt Method
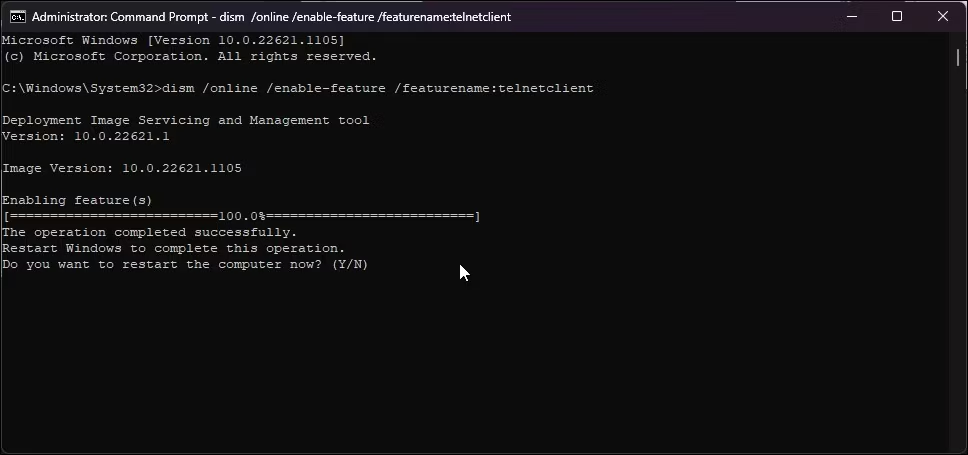
For the command prompt method to enable Telnet, follow these instructions:
Start the command prompt.
Type and execute pkgmgr /iu:"TelnetClient".
Reopen the command prompt.
Comparison of GUI and Command Prompt Methods
Method
Steps
GUI Method
Access Programs and Features in Control Panel
Press Turn Windows features on or off
Seek out Telnet Client option
Pick Telnet Client option
Hit OK
Command Prompt Method
Launch command prompt
Execute pkgmgr /iu:"TelnetClient"
Reboot command prompt
How to Use Telnet on Windows 10
Once you’ve enabled Telnet on Windows 10, you can begin to test open ports. This procedure is quite straightforward but requires you to grasp Telnet’s syntax, along with symbolic and numeric addresses.
The way to test open ports via Telnet is by typing “telnet <address> <port number>”. Here, address could be a domain name or an IP address. Domain names are easier to remember. IP addresses, however, are more precise.
To start testing open ports with Telnet, just follow these easy steps:
Launch the command prompt on your Windows 10 computer.
Enter the Telnet command, then the target address and port number. You might write telnet www.example.com 80 or telnet 192.168.0.1 22, for example.
Hit Enter to run the command.
When you run the Telnet command correctly, what happens next depends on the port’s status. If the port is closed, you’ll see an error. An open port shows a blank screen. A successful connection brings up the telnet host screen.
For network administrators and IT experts, testing open ports with Telnet is quite useful. It helps check whether network services on certain ports are available and working. This is key for fixing issues and improving the network.
Telnet Security Considerations
Telnet has major security issues because it’s unencrypted. This means data sent and received is open for anyone to see. Sensitive info is at risk, leaving it exposed to spying and changes. Passwords, too, are easily stolen when sent over Telnet.
To avoid Telnet’s security problems, stronger security is necessary. Encrypting data is one way to do this. By choosing secure methods like SSH (Secure Shell), your data stays safe. SSH encrypts info and offers better protection for logging in remotely.
“Telnet’s lack of encryption makes it highly susceptible to security breaches. It is essential to prioritize the security of your network and data by choosing secure alternatives like SSH.”
Using encryption keeps your confidential data safe. It also ensures your network’s integrity and privacy. With encrypted methods, you can connect remotely without worries about data theft or meddling.
Remember, security should always be a top priority when accessing and managing remote devices. Choosing encrypted protocols like SSH over Telnet is a proactive step towards safeguarding your network from potential threats.
Telnet Security Risks
Solution
Unencrypted protocol
Use encrypted protocols like SSH
Password vulnerabilities
Implement strong authentication methods
Data interception and tampering
Ensure data encryption during transmission
Understanding and tackling Telnet’s security flaws is key. By adopting the right security measures, you can protect your network. You’ll keep your data private and intact.
Conclusion
Telnet on Windows 10 is great for remote access and checking network problems. By turning it on, you can easily check open ports. You can also talk to other devices with text. But, it’s vital to remember that Telnet can be risky. It’s safer to use secure options like SSH when accessing remotely.
Telnet is simple to use but it’s not secure. It doesn’t encrypt your data, so people could listen in or change it. To keep your information safe, it’s better to use SSH. SSH keeps your data encrypted and makes your connection more secure. This reduces the risk of security problems.
So, Telnet can be useful for connecting to other devices and solving network issues. It lets you check open ports and chat with devices using text. But, keeping your data safe is very important. This means using secure ways to connect, like SSH, is essential. SSH not only encrypts your data but also adds extra security.
FAQ
How do I enable Telnet on Windows 10?
You can make Telnet work on Windows 10 in two ways. Using the GUI, first open Control Panel’s Programs and Features. Then, click on Turn Windows features on or off. Find and check Telnet Client, and click OK. Or, use command prompt, type “pkgmgr /iu:”TelnetClient”” and restart the prompt.
What is Telnet and how does it work?
Telnet lets two-way text chat through command-line for remote access. It’s older than TCP/IP protocol. It makes a virtual terminal connection, sending data with Telnet info over TCP. Users get a login screen, accessing the remote device as a user.
How do I use Telnet on Windows 10?
After enabling Telnet on Windows 10, you can check open ports. Use the syntax “telnet <address> <port number>”. The address can be any type. If the port works, you get a blank screen or the telnet host screen. Otherwise, it shows an error.
What are the security considerations of Telnet?
Telnet doesn’t encrypt data, so it’s risky. Info sent and received is open to intercepts, eavesdropping, and tampering. Safer options like SSH are better for remote access and management. SSH uses encryption and stronger authentication.
Why should I enable Telnet on Windows 10?
Enabling Telnet on Windows 10 is useful for testing open ports and tasks needing text chat with remote devices. It’s good for remote access and fixing network issues. Yet, it’s wise to know Telnet’s security risks and look at secure choices like SSH for remote access.
Welcome to our guide on installing WAMP on Windows 10. This is great if you’re a web developer wanting to set up a test environment. WAMP, which stands for Windows,…
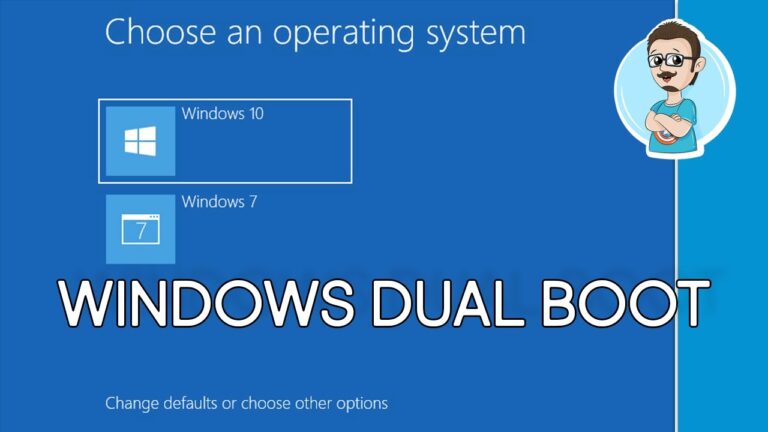
If you want both Windows 7 and Windows 10 on your computer, dual booting is a great choice. It lets you make separate spaces on your hard drive for each…
Welcome to our guide on installing Internet Information Services (IIS) on Windows 10. This guide is for developers and IT professionals. We’ll show you how to install IIS step-by-step. This…
Many users set up Windows 10 without a Microsoft account to protect their privacy. This guide will help you install Windows 10 without a Microsoft account. It gives you more…
Choosing the right SSD with Windows 10 installed is key. Knowing what to look for can boost your system’s performance. This article will give you tips on picking the best…