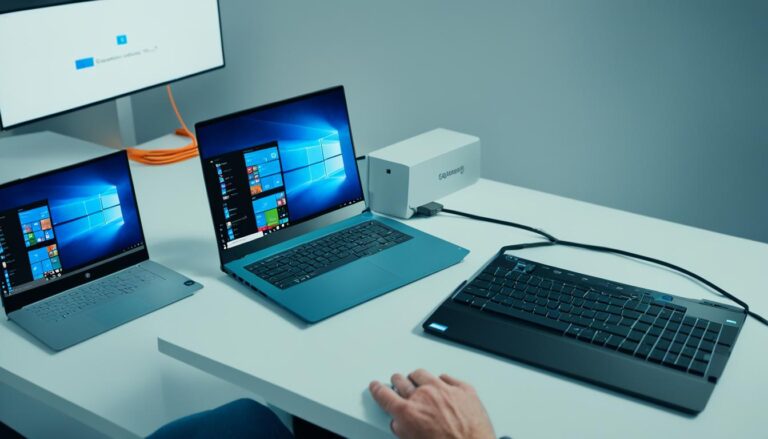
Welcome to our guide on putting Windows 10 on Parallels Desktop. If you’re a Mac user who needs Windows apps, or if you want to mix macOS and Windows, Parallels Desktop is your go-to. We’ll help you through each step of putting Windows 10 on Parallels Desktop for any situation.
Parallels Desktop is a strong virtualization tool for Mac users. It lets you use Windows without needing another computer. It’s ideal for software creators, designers, or anyone who needs Windows-only software. Parallels Desktop is both reliable and easy to use.
This guide will look at three ways to install Windows 10 in Parallels Desktop. First, if you’ve just got Parallels Desktop, we’ll show you how it helps you get and install Windows 10. Next, we’ll talk about adding a Windows 10 virtual machine if Parallels is already up and running. Lastly, we’ll explain how to move Windows 10 from a real PC to a virtual one in Parallels Desktop.
With this detailed guide, you can handle each situation easily and put Windows 10 on Parallels Desktop successfully. This guide is for both newbies and pros in virtualization. Let’s dive in!
Scenario 1: Installing Windows 10 in a new Parallels Desktop VM
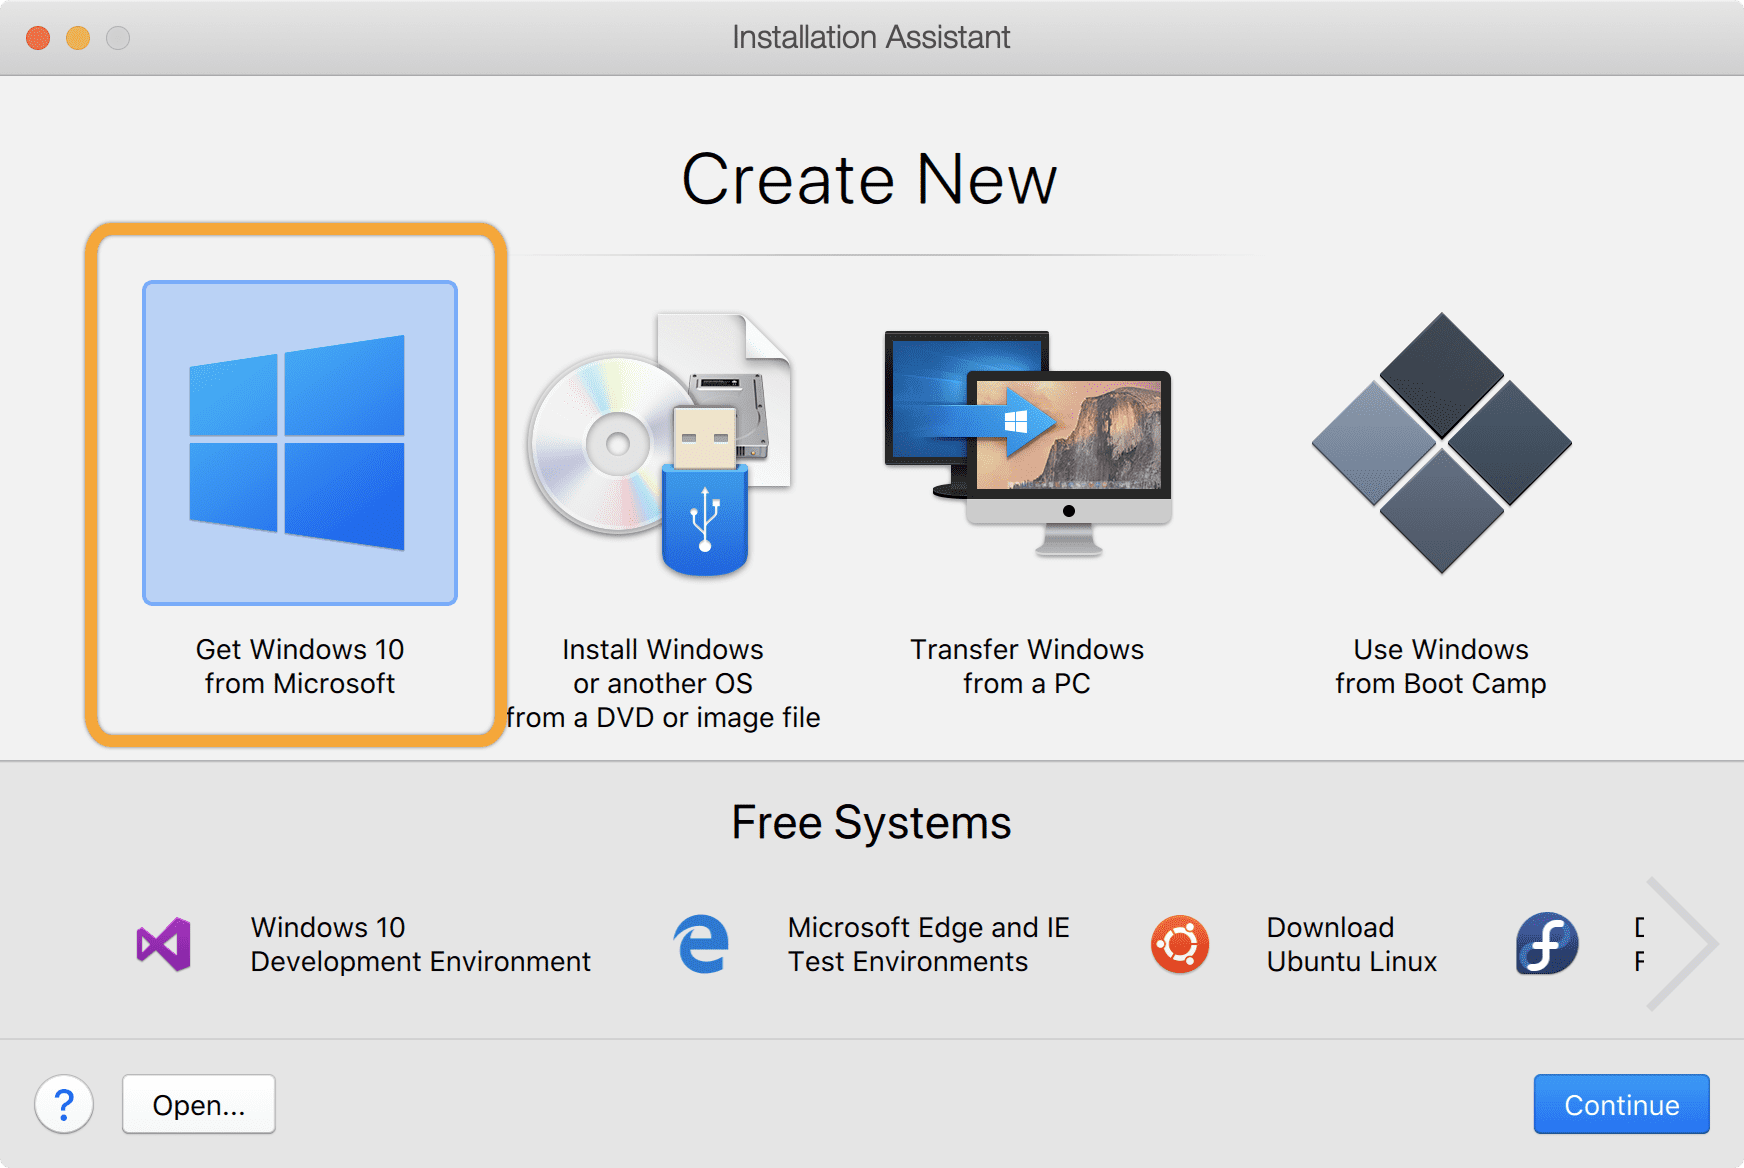
You’ve just got Parallels Desktop on your Mac. When you start Parallels Desktop, it sees you don’t have any virtual machines. It offers to get and set up Windows 10 for you. The download of Windows 10 starts. Once done, the installation into a new VM in Parallels Desktop kicks off.
After everything is set up, make sure you get all the updates for Windows 10.
Setting up Windows 10 in Parallels Desktop is straightforward. As soon as you run the software on your Mac, it notices there are no virtual machines. It goes ahead to download and install Windows 10. This makes the installation easy for you without looking for files.
The download of Windows 10 is the first step. Then, Parallels Desktop moves to the installation phase. It walks you through every step, making sure the process is easy. In a short while, your new Parallels Desktop VM is ready.
Once installed, it’s good to look for any Windows 10 updates. This way, your VM gets the latest features and security updates. Updating Windows 10 in Parallels Desktop is like doing so on a normal PC. You can update through the Windows Update settings inside the VM.
Scenario 2: Adding a Windows 10 VM to an existing Parallels Desktop
If you have Parallels Desktop on your Mac and want a Windows 10 VM, it’s easy. Just go to the File menu, select “New…” or click the “+” in the Control Center. You can then choose to get Windows 10 from Microsoft, buy it, or download it. After getting the Windows 10 files and product key, the setup is like in Scenario 1.
Start by opening Parallels Desktop. Choose “New…” from the File menu or click the “+” in the Control Center. This opens the Virtual Machine Configuration window. There, pick the option to install Windows.
Now, you can either buy Windows 10 or download a trial from Microsoft. For buying, follow the guide to get a product key. To download the trial, select “Continue without a key”.
With the Windows 10 files and key ready, start installing by following on-screen instructions. Parallels Desktop will find the Windows 10 files for you. Just choose the right options and set up your VM as you like.
Customizing VM settings
When setting up your Windows 10 VM, think about how much RAM, CPU, and storage you need. Adjust these settings to fit your Mac’s resources. Also, decide if you want to share Mac folders with Windows, have retina display, and set network choices.
“Adding a Windows 10 VM to an existing Parallels Desktop lets you smoothly run Windows apps on your Mac,” says James Johnson, a tech expert at Parallels. “These steps help make your Mac a strong station for both macOS and Windows.”
Benefits of adding a Windows 10 VM to an existing Parallels Desktop
1. Allows you to access and use Windows-exclusive software on your Mac.
2. Provides a secure and isolated environment for running Windows applications.
3. Offers flexibility and convenience in managing multiple operating systems on one machine.
4. Enables seamless file sharing and integration between macOS and Windows.
5. Streamlines workflow and increases productivity by eliminating the need for separate devices.
With your Windows 10 VM added to Parallels Desktop, enjoy running Windows apps smoothly on your Mac.
Scenario 3: Transferring Windows 10 from a physical PC to a Parallels Desktop VM
If you want to move Windows 10 from a physical PC into a Parallels Desktop VM, use the Transfer Windows feature. This method includes moving apps, data files, and Windows itself. It lets you run Windows 10 on your Mac without another physical machine.
The transfer happens over the network, so you don’t need external drives. The time to transfer depends on how much data the PC has and your network’s speed.
To start, install the Parallels Transfer Agent on the PC you’re moving from. Follow the simple steps to move everything to your Parallels Desktop VM. After this, you’ll have Windows 10 running in your VM.
For a smooth transfer, connect both the PC and Mac to the same network. A wired connection is best for speed and stability. Also, check that your Parallels Desktop VM has enough disk space for the data.
Benefits of Transferring Windows 10 to a Parallels Desktop VM
Consolidation: By transferring Windows 10 to a Parallels Desktop VM, you can consolidate your work environment, reducing the need for multiple physical machines.
Mac Compatibility: Running Windows 10 in a Parallels Desktop VM allows you to seamlessly switch between Mac and Windows applications without the need for dual booting.
Flexible Work Environment: Transferring Windows 10 to Parallels Desktop gives you the flexibility to use your preferred operating system and applications, regardless of the underlying hardware.
Enhanced Security: With Parallels Desktop’s security features, such as isolated VMs and password protection, your Windows 10 environment is secure and protected within your Mac.
Follow these easy steps to move Windows 10 from a physical PC to a Parallels Desktop VM. This lets you enjoy virtualization on your Mac. Get the convenience, flexibility, and compatibility of running Windows 10 in a Parallels Desktop VM.
Installing Windows on Mac using Parallels Desktop with an installation source and product key
Want to install Windows on your Mac using Parallels Desktop? If you have a Windows installation source like a DVD disc or USB storage, and a valid product key, you’re set. This process is simple and quick.
Here are the steps to follow:
Open Parallels Desktop on your Mac.
Choose the “New” option.
Select the Windows installation source, whether it’s a DVD disc or USB storage.
You will be prompted to enter the Windows license key. Make sure to have your valid product key ready.
Choose the settings for the Windows installation, such as the storage location and customization options.
Once you’ve entered the necessary information, the installation process will begin.
After the installation is complete, you can start using Windows on your Mac.
To access Windows, you can open a Windows application or click the power button in the Control Center of Parallels Desktop.
Remember, having a Windows installation source and product key is crucial for a successful installation. Have them ready before starting the process.
Installing Windows on your Mac with Parallels Desktop lets you easily switch between macOS and Windows. You can run Windows apps without needing another device. Parallels Desktop’s technology makes this possible.
By following these simple steps, installing Windows on your Mac with Parallels Desktop is straightforward. This brings the convenience of using Windows for work, gaming, or other needs right on your Mac.
Installing and activating Parallels Desktop for Windows on Mac
Before Installing Windows on Mac
Before you start installing Windows on your Mac with Parallels Desktop, you must first set up Parallels Desktop. Here are the steps to get going:
Download Parallels Desktop Installer: Start by getting the Parallels Desktop installer from their official site.
Mount the Installation File: After downloading, find and double-click the installer file to mount it.
Accept the Software License Agreement: Open the mounted installation volume, find the license agreement, read it, and click Agree to move forward.
Enter Your Mac User Password: You’ll need to enter your Mac user password to authorise the installation. Put in the password and hit Install Software.
Activate Parallels Desktop: When the installation is complete, open Parallels Desktop. Activate it using your license key. Just follow the prompts and complete the activation.
Installing Windows on Mac using Parallels Desktop
After setting up Parallels Desktop, you’re ready to install Windows. Look at the different sections in this guide (Scenario 1, Scenario 2, Scenario 3). They will show you how to either set up Windows in a new VM, add a Windows 10 VM to your existing setup, or move Windows 10 from a PC to a Parallels Desktop VM.
Make sure to follow these steps closely. Check you have the correct installation source and product key for Windows. With Parallels Desktop, running Windows on your Mac becomes a breeze. This lets you work and play across both systems effortlessly.
Benefits of Installing Parallels Desktop
Benefits of Activating Parallels Desktop
1. Run Windows applications on your Mac without needing another PC.
1. Unlock the complete features of Parallels Desktop.
2. Easily switch between Mac and Windows applications.
2. Get software updates and new functionalities.
3. Access a vast selection of Windows-only software and games.
3. Enjoy better performance and more stability.
4. Share files and work together across operating systems.
4. Get help and support when you need it.
Conclusion
Installing Windows 10 with Parallels Desktop makes running Windows apps on your Mac easy. You can set up a new virtual machine or add Windows 10 to an existing one. You can even move Windows 10 from a real PC. Just follow this guide to install Windows 10 in Parallels Desktop.
This approach lets you use Windows-only software and tools on your Mac without needing another device. Parallels Desktop blends Windows and macOS together. This means more flexibility and convenience for work, fun, and everything in between.
It doesn’t matter if you’re a pro needing specific software, a gamer after Windows-only games, or just curious. Installing Windows 10 in Parallels Desktop opens up your Mac’s full potential. Start following this guide today. You’ll soon enjoy everything Windows has to offer, right on your Mac.
FAQ
What are the different scenarios for installing Windows 10 in Parallels Desktop?
You can install Windows 10 in a new Virtual Machine (VM). Or add it to an existing Parallels Desktop. You can also transfer it from a physical PC to a VM.
How do I install Windows 10 in a new Parallels Desktop VM?
Starting with Parallels Desktop, it guides you through the setup. It helps with downloading and installing Windows 10. Remember to update Windows 10 after installation.
How can I add a Windows 10 VM to an existing Parallels Desktop?
In Parallels Desktop, choose “New…” from the File menu. Or click “+” in the Control Center. Then follow steps to download or buy Windows 10 and install it.
What is the process for transferring Windows 10 from a physical PC to a Parallels Desktop VM?
Use the Transfer Windows feature to move Windows 10 to a VM. Install Parallels Transfer Agent on your PC and follow the steps. Transfer time varies based on data size and network speed.
Can I install Windows on my Mac using Parallels Desktop with an installation source and product key?
If you have the Windows installation source and a valid product key, yes. Open Parallels Desktop, choose “New,” and select your installation source. The prompts will guide you to complete the setup.
What is the process for installing and activating Parallels Desktop for Windows on Mac?
First, install and activate Parallels Desktop. Download the installer, accept the agreement, and enter your Mac password. Then activate it with your license key.
When you try to install, uninstall, or update a program on Windows, you might see error messages. These messages indicate that the installation was cancelled. You may see errors like…
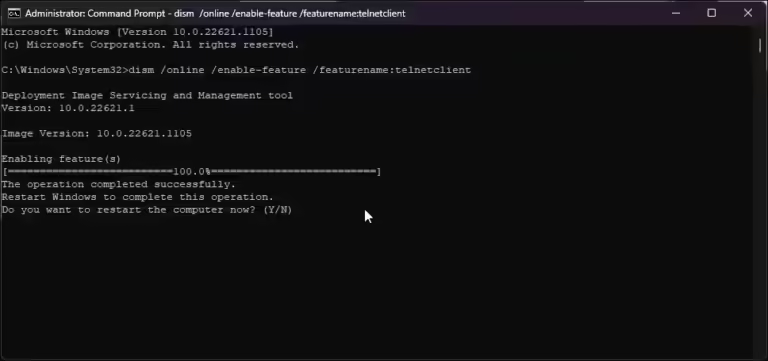
Telnet is a key tool for remote computer access. It’s great for fixing network problems. Sadly, Windows 10 doesn’t have Telnet set up from the start. We’ll show you how…
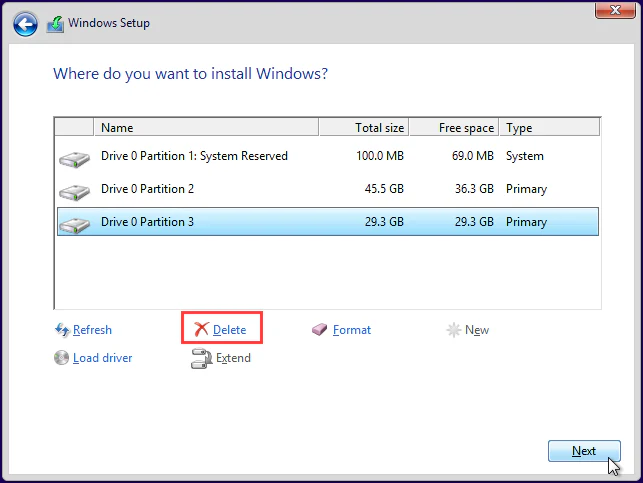
Welcome to our guide on installing Windows 10 on a new hard drive. This guide is perfect whether you’re building a new PC or upgrading an old one. We’ll show…
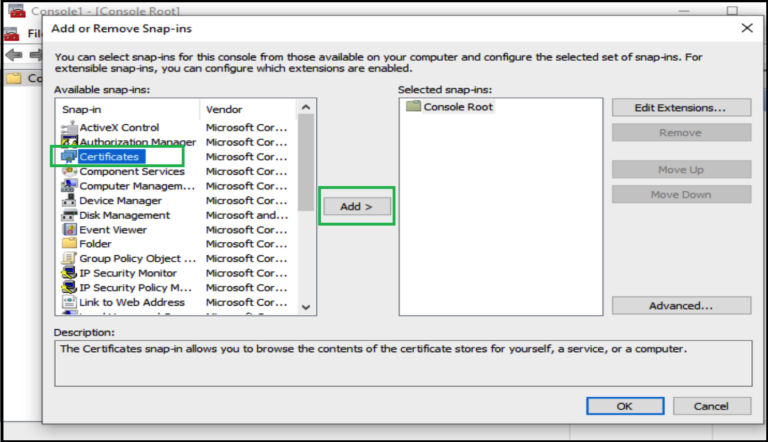
Welcome to our guide on installing SSL certificates in Windows 10 for better security. In today’s world, keeping sensitive information safe is crucial. SSL certificates help secure communications effectively. By…
Welcome to our guide on setting up a Seagate external hard drive on Windows 10. This will help if you need more space or want to back up files. Installing…
Installing Visual Basic 6 on Windows 10 might seem tough, especially if you use old apps. Many are looking for ways to get VB6 running on their modern computers. They…