Installing Windows 11 with a local account gives you more privacy and control. Windows 11 usually asks you to use a Microsoft account when installing. But, some people prefer a local account instead.
This is handy for a kid’s PC, or if you’re giving away your computer. You might also want to keep your info private and not use a Microsoft account. You can use commands during setup or create a USB disk with Rufus for this.
To install Windows 11 with a local account, follow these steps:
Keep going with the Windows 11 setup until you see “choose a country”.
Press Shift + F10 to open a command window.
Type “OOBE\BYPASSNRO” and disable the need for internet.
Restart your computer and get back to that screen.
Press Shift + F10 again, type “ipconfig /release” to turn off the internet.
Close the window and pick your region, keyboard layout, and other options.
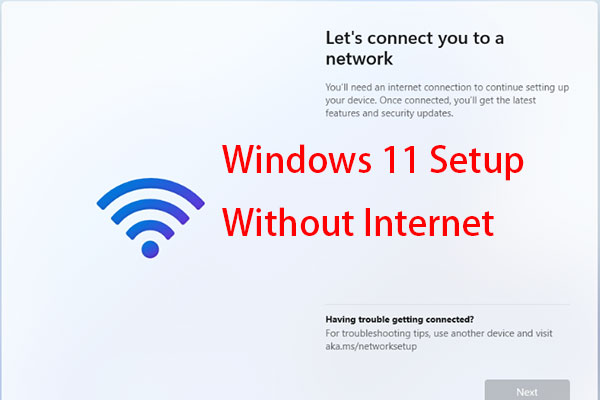
If asked to connect to a network, click “I don’t have Internet” and pick “Continue with limited setup”.
Make a username and password for your local account and finish the setup.
Creating a Windows 11 Install Disk that Allows Bypassing Microsoft Accounts
If you’d rather make a Windows 11 install disk that skips Microsoft accounts, do this:
Get the Windows 11 ISO file from the Microsoft site.
Put in a USB drive (needs to be at least 8GB).
Get and open Rufus (version 4.4 or newer).
In Rufus, choose the USB and click “Select” for the ISO.
Hit “Start” to make the USB disk ready.
In Rufus, choose the option to not need a Microsoft account online.
Click “OK” to agree to overwrite the USB.
Let Rufus copy the files to the USB. You’ll then have a USB disk that lets you skip Microsoft accounts.
Using a Local Account with Windows 10
With Windows 10, using a local account is also an option. The steps vary by the Windows 10 version:
For Windows 10 Home: Disconnect from the internet during setup. If asked to connect, click “I don’t have internet”. Continue to create a local account.
For Windows 10 Pro: Choose “personal use” during setup, then find the offline account option to make a local account.
Conclusion
Using a local account for Windows 11 means more privacy and control. You can use commands or a USB disk made with Rufus. Windows 10 users also have the choice of a local account. This helps keep your personal data more secure and gives you more privacy in Windows.
If you want to install Windows 11 without a Microsoft account, here are the steps to follow. A local account will be used instead. This way, you can keep your setup more private.
Proceed with the Windows 11 installation process as usual until you reach the “choose a country” screen.
Press Shift + F10 to open a command prompt.
Type “OOBE\BYPASSNRO” to disable the Internet connection requirement.
Reboot the computer and return to the same screen.
Press Shift + F10 again and type “ipconfig /release” to disable the Internet.
Close the command prompt and continue with the installation, selecting the region, keyboard, and other options.
When prompted to connect to a network, click “I don’t have Internet” and choose “Continue with limited setup.”
Enter a username and password for your local account and complete the installation process.
By using this method, you avoid the need for a Microsoft account. You gain more privacy and control while setting up Windows 11 on your machine.
Tip: A local account is great when setting up a PC for a child or when selling or giving away a PC. It’s also good if you want to keep your details private by not creating a Microsoft account.
Note: The image above shows how to install Windows 11 without a Microsoft account. It includes turning off the Internet connection requirement and choosing to continue with limited setup.
Creating a Windows 11 Install Disk that Allows Bypassing Microsoft Accounts
Step-by-Step Guide
If you want to make a Windows 11 install disk without needing a Microsoft account, here’s how:
Then, plug in a USB flash drive that’s 8GB or bigger.
Next, download and open Rufus (version 4.4 or above), which helps create bootable USB drives.
In Rufus, pick your USB drive and press “Select” to find the downloaded ISO file.
Hit “Start” to begin the disk creation. Remember to save any important files from your USB as it will be cleared.
Within Rufus’s options, choose to skip the need for an online Microsoft account.
Click “OK” to confirm you’re okay with clearing the USB drive.
Wait while Rufus transfers the needed files onto the USB drive. It might take a little time.
After Rufus is done, you’ll have a bootable Windows 11 install disk that doesn’t require a Microsoft account.
Benefits of Creating a Windows 11 Install Disk
You can install easily without a Microsoft account.
It gives you more control over your privacy and data.
It’s handy for setting up Windows 11 on several devices.
Great for when you’re selling your PC, giving it away, or setting up a PC for your child.
Using a Local Account with Windows 10
In Windows 10, you can pick between a local account or a Microsoft account. The steps to set this up slightly differ by Windows 10 edition.
Windows 10 Home
To use a local account in Windows 10 Home during setup, simply disconnect from the Internet. If it asks to connect online, just click “I don’t have internet”. You’ll proceed with a limited setup. This method lets you avoid using a Microsoft account.
Windows 10 Pro
For Windows 10 Pro, choose ‘personal use’ at the start. Then click the link for an offline account. This choice lets you keep control over your Windows 10 Pro with a local account.
Windows 10 Edition
Process to Create Local Account
Windows 10 Home
Disconnect the PC from the Internet during setup and choose “I don’t have internet” to create a local account.
Windows 10 Pro
Select “personal use” during setup and choose the offline account link to create a local account.
Choosing a local account over a Microsoft one gives you more control. This is true for both Windows 10 Home and Pro versions. The process is easy and makes sure your operating system is set up just how you like.
Conclusion
Installing Windows 11 with a local account gives you more privacy and control. You can do this by using commands during setup or by making a special install disk. You can also use a local account for Windows 10, but the process is a bit different for Home and Pro editions.
Using a local account lets you keep a tight grip on your personal data for better privacy. This is key for those who value privacy and don’t want to use a Microsoft account. It’s also useful when setting up Windows for a child’s PC or before giving away the computer. This way, your personal information stays with you.
Choosing a local account means your Windows experience can be just as you like it, without risking your privacy. Whether you’re using Windows 11 or Windows 10, a local account gives you the power over your personal details. This ensures better privacy while you use the Windows operating system.
FAQ
How can I install Windows 11 with a local account?
To install Windows 11 with a local account, you can follow these steps:
What are the reasons to install Windows 11 with a local account?
There are a few reasons to choose a local account for Windows 11. You might do this for a child’s PC. Or if you’re giving away or selling your computer. Also, it’s good if you want to keep your information private, avoiding a Microsoft account.
How do I create a modified Windows 11 install disk that allows bypassing Microsoft accounts?
To create a Windows 11 install disk that avoids Microsoft accounts, here’s what you do:
Can I use a local account with Windows 10?
Yes, using a local account in Windows 10 is possible. How you do this may vary by the version of Windows 10 you have:
Choosing to install Windows 11 in a different language requires following some key steps. This guide aims to help you install Windows 11 in the language you prefer successfully. Windows…
Usually, Windows 11 asks you to sign in with a Microsoft account during its setup. But you might want to use a local account instead. This guide shows you how…
To install network adapter drivers on Windows 11 without internet, there are several techniques. They help you get through the Windows 11 setup without needing an internet. This allows you…
Welcome to our guide on setting up Hadoop on Windows 11. In this tutorial, we’ll show you how to install Hadoop, a big data tool, on your computer. It’s designed…
Windows 11 usually needs you to log in with a Microsoft account during setup. But, some users prefer a local account due to privacy worries or if the PC is…
If you’re planning to upgrade to Windows 11, picking the right SSD is key. Windows 11 comes with cool new features and improvements. Yet, it requires your SSD to meet…