Windows 11 usually asks you to sign in with a Microsoft account when you set it up. But, there might be times when you’d rather use a local account. This could be if you’re setting up a PC for a child, selling or donating the PC, or want to keep your info private. Here, we’ll look at two ways to installWindows 11 without a Microsoft account.
For the first method, you can set up a local account as you installWindows 11. Just follow these steps:
1. Go through the installation until you get to the “choose a country” page.
2. Hit Shift + F10 to open command prompt.
3. Enter “OOBE\BYPASSNRO” to turn off the need for Internet.
4. Press Shift + F10 again and type “ipconfig /release” to switch off the Internet.
5. Close the command prompt and carry on with the install. Choose your region and other settings.
6. When asked to connect to a network, pick “I don’t have Internet.”
7. Select “Continue with limited setup” and then make a local account with a username and password.
8. Finish the rest of the installation like you normally would.
The second way is to make a Windows 11 install disk that lets you skip the Microsoft account step. Here’s how:
1. Get the Windows 11 ISO file from Microsoft’s website.
2. Put a USB drive (at least 8GB) into your computer.
3. Download Rufus, a free tool for making bootable USB drives, and open it.
4. In Rufus, pick your USB drive and the Windows 11 ISO file.
5. Change the Rufus settings so you don’t need a Microsoft account online.
6. Hit “Start” to make your bootable USB drive.
7. Use this USB to install Windows 11. During setup, choose to make a local account instead of a Microsoft one.
When making a local account in Windows 11, remember a few things:
– Use a strong password to keep your data safe.
– You might want to add security questions for extra account security.
– Don’t forget your local account details as you’ll need them to log in later.
– Finish the installation process as you like, based on what you need.
Using a local account in Windows 11 has its pros and cons. Let’s look at some:
Pros:
– More privacy because your activities aren’t linked to a Microsoft account.
– It’s simpler when setting up a PC for a child or a PC that many will use.
– You don’t rely on the internet to sign in.
Cons:
– You won’t have full access to Microsoft services and features that need a Microsoft account.
– It might be harder to sync settings and data across different devices.
– Recovering your account info could be tough without a link to Microsoft services.
Installing Windows 11 with an offline account offers flexibility and privacy for those who’d rather not use or link a Microsoft account during setup. Whether you use a quick command prompt method or make a custom install disk, the steps above will help you install Windows 11 using a local account. Think about the pros and cons and decide based on what you need and prefer.
Method 1: Installing Windows 11 with a Local Account
Prefer to install Windows 11 without a Microsoft account? There’s an easy trick for this. Just follow these simple steps to use a local account during setup.
Proceed with the Windows 11 installation until you reach the “choose a country” screen.
Press Shift + F10 to open a command prompt.
Type “OOBE\BYPASSNRO” to disable the Internet connection requirement.
Press Shift + F10 again and type “ipconfig /release” to disable the Internet.
Close the command prompt and continue with the installation, choosing the region, keyboard, and other options.
When prompted to connect to a network, select “I don’t have Internet.”
Choose “Continue with limited setup” and proceed to create a local account by entering a username and password.
Complete the rest of the installation process as usual.
Just by following these steps, you can install Windows 11 with a local account. This way, you avoid using a Microsoft account.
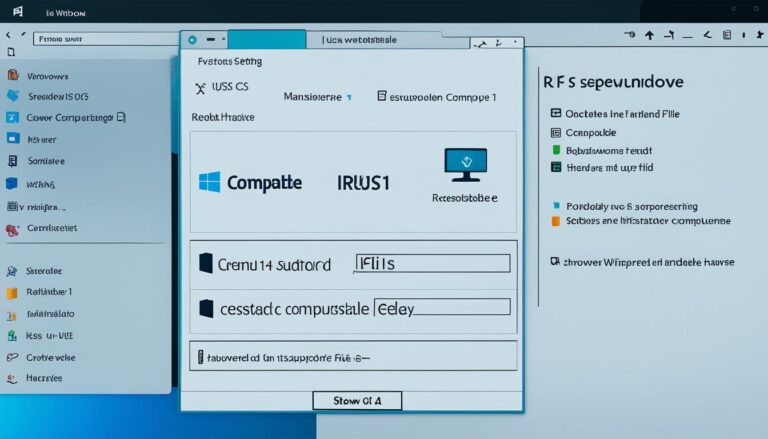
Method 2: Creating a Windows 11 Install Disk with Offline Account Option
Want to avoid the Microsoft account requirement when installing Windows 11? You can make a custom install disk with the offline account option. This lets you set up a local account without needing the internet. Here’s how to do it:
Insert a USB flash drive with at least 8GB of storage.
Download and open Rufus, a tool for creating bootable USB drives.
Pick the USB drive in Rufus and load the Windows 11 ISO file.
Tweak Rufus settings to skip the Microsoft account requirement.
Hit “Start” to make the USB drive bootable.
Use this USB to install Windows 11 on your PC.
When setting up, choose to create a local account, not a Microsoft one.
This way, you install Windows 11 with a custom disk that allows an offline account. It enables you to enjoy the perks of a local account while setting up Windows 11.
Note: The image above is for illustrative purposes only and does not represent the actual Windows 11 Install Disk.
Making a custom install disk with the offline account option provides more control over your installation. It also helps keep your privacy by not connecting your Windows 11 setup to a Microsoft account. This is perfect if you prefer using a local account or for computers used by many people.
Tips for Setting up a Local Account in Windows 11
Setting up a local account in Windows 11? Keep these helpful tips in mind. They ensure the process is smooth and secure.
Choose a secure password for your local account: Pick a strong password with upper and lower case letters, numbers, and special characters. It keeps your data safe from unauthorised access.
Consider setting up security questions: Security questions add another protection layer. They help you get back into your account if you ever forget your password.
Ensure you remember your local account credentials: It’s essential to remember your local account’s username and password. You’ll need them for future logins. A password manager can help keep your login details safe.
Make sure you also go through the rest of the setup process. It’s important to tailor your Windows 11 setup to meet your own needs and preferences.
Why Choose a Local Account?
Opting for a local account in Windows 11 protects your privacy. It’s perfect for setting up a child’s PC or a shared computer. This way, you keep full control of your data without needing an internet connection to log in.
With these tips, you can set up a local account on Windows 11. Enjoy better privacy and control over your device.
Summary of Tips for Setting up a Local Account in Windows 11
Tips
Description
Choose a secure password
Select a strong password to protect your data.
Consider security questions
Add security questions for additional account protection.
Remember your credentials
Ensure you remember your local account username and password.
Pros and Cons of Using a Local Account in Windows 11
Choosing a local account in Windows 11 has its ups and downs. It’s critical to weigh these points before selecting a local account in the setup.
Pros
Enhanced privacy protection: A local account adds extra privacy by not linking your actions to a Microsoft account.
Ease of use: For setting up a child’s PC or a shared one, a local account makes things simpler and more accessible.
No reliance on internet connection: A local account doesn’t need the internet for signing in, which adds convenience.
Cons
Limited access to Microsoft services: You’ll find restricted access to some Microsoft services and features with a local account.
Potential limitations in syncing settings and data: There could be syncing limitations across devices with a local account.
Difficulty in recovering account information: Without a link to Microsoft, recovering account details can get trickier with a local account.
Pros of Using a Local Account in Windows 11
Cons of Using a Local Account in Windows 11
Enhanced privacy protection
Limited access to Microsoft services
Ease of use when setting up a PC for a child or a shared computer
Potential limitations in syncing settings and data across devices
No reliance on an internet connection for account authentication
Difficulty in recovering account information without a direct link to Microsoft services
As it stands, a local account in Windows 11 has both pros and cons. Think about these aspects to choose wisely, based on your own needs and preferences.
Conclusion
Installing Windows 11 with an offline account gives users flexibility and privacy. You won’t need to create or link a Microsoft account. Whether you use the command prompt trick or make a custom install disk, the steps in this article will help you set up Windows 11 with a local account.
When choosing between a local and a Microsoft account, think about the pros and cons of each. Then, pick what fits your needs and preferences best.
FAQ
Can I install Windows 11 without a Microsoft account?
Yes, Windows 11 can be set up with a local account instead. This choice is good when you want more privacy. It’s handy if the PC is for a child, or if you’re selling or donating it.
How do I install Windows 11 with a local account?
You have two options for installing Windows 11 using a local account. One way is a clever workaround during installation. Another way is making a custom install disk that skips the need for a Microsoft account.
What is the first method for installing Windows 11 with a local account?
The first way involves a trick while installing Windows 11. You disable the internet connection requirement, create a local account, and carry on with the normal installation process.
How do I create a Windows 11 install disk with the option for a local account?
For the second method, you make a custom Windows 11 install disk. You use a tool named Rufus for this. The disk will let you skip needing a Microsoft account during setup.
What should I consider when setting up a local account in Windows 11?
When creating a local account, pick a strong password and think about security questions for extra safety. Remember your login details. Make sure to finish the installation the way you prefer, paying attention to any requirements.
What are the pros and cons of using a local account in Windows 11?
A local account gives you more privacy and is simpler to use on shared computers. It doesn’t need internet to log in. However, you might not get all Microsoft services and features that need a Microsoft account. You could face limits in syncing your settings and data across devices. Recovering your account could also be harder.
Adding more storage to your Windows 11 can greatly improve its performance. Many people find they run out of space due to larger files and apps. This guide will help…
Active Directory Users and Computers (ADUC) is essential for managing users and access in a network. Installing ADUC on Windows 11 can be done through PowerShell. The method varies based…
The Snipping Tool is a built-in app for screenshots in Windows 10 and 11. It lets you capture shots, mark them, and share quickly. Here’s how to get it on…
Choosing to install Windows 11 in a different language requires following some key steps. This guide aims to help you install Windows 11 in the language you prefer successfully. Windows…
Welcome to our guide on how to install Ubuntu alongside Windows 11. This setup lets you enjoy the best of both worlds by switching between the two systems easily. It’s…
Microsoft has set certain hardware requirements for Windows 11. But not everyone has the right equipment. Rufus is a handy tool that helps make bootable USB flash drives from ISO…