Looking to put Windows 10 on your Lenovo ThinkCentre? You’re in the right spot. We collected vital tips from many places for an easy update. These tips will make the installation straightforward, no matter your experience.
Users often face the “can’t create partition” error when installing Windows 10 on Lenovo ThinkCentre. It happens during the SSD selection or partitioning phase. Even if the system recognizes the SSD, this error can still pop up. We’ll look into ways to solve this problem soon.
Troubleshooting the “Can’t Create Partition” Error
If you run into the “can’t create partition” error during the Windows 10 setup on your Lenovo ThinkCentre, there’s no need to panic. You can take several steps to fix this problem. This will help you get Windows 10 up and running on your device.
1. Check SSD Connectivity
Start by making sure the SSD is properly connected to your Lenovo ThinkCentre. Check all cables and connections to ensure they are secure. If needed, reseat the SSD to ensure it’s properly connected.
2. Update SSD Firmware
Old or incompatible SSD firmware might cause errors when creating partitions during the Windows 10 setup. Go to the SSD manufacturer’s website and look for any firmware updates. Download the updates and follow the provided instructions to update your firmware. This may solve the partition error.
Some Lenovo ThinkCentre models come with Secure Boot turned on. This feature can sometimes block the partitioning process during the Windows 10 setup. Restart your device and hit the right key (usually F2 or Delete) to access the BIOS settings. Find the Secure Boot setting and turn it off. Save your changes and exit the BIOS. Try the Windows 10 setup again to see if the error goes away.
If changing BIOS settings seems tricky, reach out to Lenovo support or check their website for help.
“By making sure the SSD is connected right, updating its firmware, and turning off Secure Boot, you can fix the ‘can’t create partition’ error. This lets you install Windows 10 on your Lenovo ThinkCentre without issues.”
4. Remove Additional Hard Drives
At times, having more than one hard drive connected to your Lenovo ThinkCentre can lead to issues during partitioning. Disconnect any other hard drives for now and try installing Windows 10 on your SSD once more. After a successful installation, you can reconnect the other drives.
5. Use Diskpart Utility
If you’re still facing issues, the Diskpart utility might help. Here’s how to use it:
Boot your Lenovo ThinkCentre from Windows 10 installation media.
During the setup, press Shift + F10 to open a Command Prompt.
Type diskpart and hit Enter to start the Diskpart utility.
To create partitions, use these commands:
list disk: Shows a list of disks. Find your SSD’s disk number.
select disk [disk number]: Put your SSD’s disk number here.
clean: Removes any existing partitions on the chosen disk.
create partition primary: Makes a primary partition on the disk.
format fs=ntfs quick: Quickly formats the new partition with NTFS.
active: Sets the partition as active.
Type exit and press Enter to leave Diskpart.
Keep going with the Windows 10 setup, and you should get past the error.
Be very careful when using Diskpart since it’s about manually making and formatting partitions. Make sure to choose the right disk to avoid losing any data.
Summary
Follow these steps to fix the “can’t create partition” error and get Windows 10 installed on your Lenovo ThinkCentre. Make sure the SSD is connected right, update its firmware, turn off Secure Boot if needed, remove any extra hard drives, and use Diskpart if necessary. If you need more help, don’t hesitate to contact Lenovo’s support or visit their website.
Alternative Solution: Cloning the Old Drive to the SSD
If you can’t fix the “can’t create partition” error during the Windows 10 installation on your Lenovo ThinkCentre, consider cloning. This means you first install Windows 10 on the old drive. Then you copy everything over to the SSD. It’s not the best for SSD performance but it’s a good option if nothing else works. Cloning needs extra software and a lot of care to make sure everything from the operating system to your data moves over correctly.
How to Clone the Old Drive to the SSD:
First, connect the SSD to your Lenovo ThinkCentre using a suitable cable.
Ensure you have reliable cloning software installed on your computer.
Launch the cloning software and select the option to clone the old drive to the SSD.
Follow the on-screen instructions to initiate the cloning process.
Wait for the cloning process to complete, which may take some time depending on the size of the data being transferred.
Once the cloning is finished, disconnect the old drive from the computer.
Restart your Lenovo ThinkCentre and boot from the SSD.
Cloning the old drive to the SSD means you can move your operating system and data without the “can’t create partition” error. But remember, cloning might not get the best performance out of the SSD. If you can, it’s better to do a clean Windows 10 install on the SSD.
Note: Make sure to back up all your important files before cloning. This prevents any loss of data during the process.
Always look at the official documentation from the cloning software’s maker for specific instructions. This is key to solving the “can’t create partition” error and getting Windows 10 onto your Lenovo ThinkCentre via the SSD successfully.
Pros of Cloning:
Cons of Cloning:
Allows you to transfer the operating system and data without the “can’t create partition” error.
Saves time compared to troubleshooting other solutions.
Keeps your setup and configurations.
May limit performance versus a clean install.
Needs extra software and attention to detail.
Could miss out on the full benefits of the SSD.
Troubleshooting Charger Incompatibility Message
Some Lenovo ThinkCentre users have seen a message about charger incompatibility when installing Windows 10. This happens if the charger does not give enough power. To fix this, you can try these steps:
Make sure your charger matches your Lenovo ThinkCentre and gives the power needed for Windows 10 installation. Check the manufacturer’s details or ask Lenovo support for the right charger.
Look at the charging port for any damage or blockages. Use compressed air or a soft brush to clear any dust.
If you can, use a different charger that works with your ThinkCentre. This is a good way to see if the problem is with the charger.
Reset your ThinkCentre’s power settings might fix the issue. Turn off your computer, unplug the charger, and remove the battery if possible. Press the power button for 30 seconds. Then, plug everything back in and turn it on.
If you still see the charger incompatibility message, contact Lenovo support. They can offer more help specifically for your ThinkCentre model.
Following these steps should help fix the charger incompatibility message. This way, you can continue installing Windows 10 on your Lenovo ThinkCentre without issues.
Optimal Practices for Windows 10 Installation on Lenovo ThinkCentre
For a smooth Windows 10 installation on your Lenovo ThinkCentre, follow these best practices:
Ensure compatibility: Before starting, ensure your Lenovo ThinkCentre supports Windows 10. Check Lenovo’s website or contact support for details. It’s key to use the right installation media and drivers for your model.
Backup important data: Make a backup of crucial files and data before you start. This protects your info if problems arise during installation. Use an external drive, cloud, or backup software for this.
Clear disk space: Make sure there’s enough free disk space on your Lenovo ThinkCentre. This avoids issues due to lack of storage. Delete unnecessary files and apps to create space.
Disconnect external devices: Unplug unneeded devices like printers or hard drives before installing. This prevents conflicts or driver problems during the installation.
Update BIOS and firmware: Look for BIOS and firmware updates for your Lenovo ThinkCentre. Doing so enhances compatibility and stability. Visit Lenovo’s site or use their update tool for the latest versions.
Disable antivirus software: Turn off any antivirus or third-party security temporarily before the installation. Some antivirus may disrupt the process. Don’t forget to turn them back on and update after installing.
Use a wired internet connection: Connect your Lenovo ThinkCentre to the internet with a cable, not wirelessly. A wired connection is more stable, reducing installation issues.
Quote:
“By following these steps, you’ll likely have a better Windows 10 setup experience on your Lenovo ThinkCentre. Taking precautions and making sure everything’s compatible helps avoid common installation problems.”
Every system is different, so it’s important to follow Lenovo’s guidelines. Check the official docs and support for the latest info on your Lenovo ThinkCentre model.
Conclusion
Putting Windows 10 on a Lenovo ThinkCentre is easy if you know how. It’s all about dealing with typical issues, like the “can’t create partition” error. Address these problems and the install goes smoothly. Use the advice in this guide to avoid common mistakes.
With careful steps, you can get Windows 10 running on your Lenovo ThinkCentre. Before you start, always back up your files. This keeps your data safe during the upgrade. It’s crucial for a hassle-free update.
This guide gives you all you need to tackle any installation trouble. Once installed, Windows 10 offers better performance and security. Enjoy your better Lenovo ThinkCentre with the new system.
FAQ
What is the “can’t create partition” error during the Windows 10 installation on Lenovo ThinkCentre?
The “can’t create partition” error happens when you try to pick or make a partition on the SSD during install.
How can I troubleshoot the “can’t create partition” error during the Windows 10 installation on my Lenovo ThinkCentre?
To fix the “can’t create partition” error, follow these steps:
– Check that the SSD is recognized by the system.
– Remove any existing partitions on the SSD before installation.
– Update your Lenovo ThinkCentre BIOS firmware.
– Turn off secure boot and use legacy mode in BIOS settings.
– Try connecting the SSD to another SATA port on your motherboard.
Is there an alternative solution to address the “can’t create partition” error during the Windows 10 installation on Lenovo ThinkCentre?
Yes, you can install Windows 10 on a old drive and clone it to the SSD. But, this might slow the SSD. Remember, cloning needs extra software and careful work to successfully move your system and data.
How can I troubleshoot the charger incompatibility message during the Windows 10 installation on my Lenovo ThinkCentre?
To fix the charger incompatibility message, try these steps:
– Use a charger with enough power.
– Use the Lenovo original charger or a suitable one.
– Compare the charger’s power specs to your Lenovo ThinkCentre needs.
What are the optimal practices for a successful Windows 10 installation on Lenovo ThinkCentre?
For a good Windows 10 install on your Lenovo ThinkCentre, use these best practices:
– Check if your Lenovo ThinkCentre fits Windows 10 system needs.
– Back up key data before you start.
– Disconnect any non-essential external devices.
– Make sure you have a good internet connection for the install.
– Update your device drivers and BIOS from Lenovo’s website.
– Carefully follow the installation steps and note any special instructions.
Intel Unison lets you link your tablet or phone with your Windows 10 PC. It makes your devices work together smoothly. By doing a few easy steps, you can use…
Welcome to our guide on installing drivers in Safe Mode on Windows 10. Safe Mode allows you to start your Windows 10 system in a way that can help find…
Many people wonder how long it takes to install Windows 10. The time needed can change due to different factors. We’ll look at these reasons in this article. The installation…
Many users set up Windows 10 without a Microsoft account to protect their privacy. This guide will help you install Windows 10 without a Microsoft account. It gives you more…
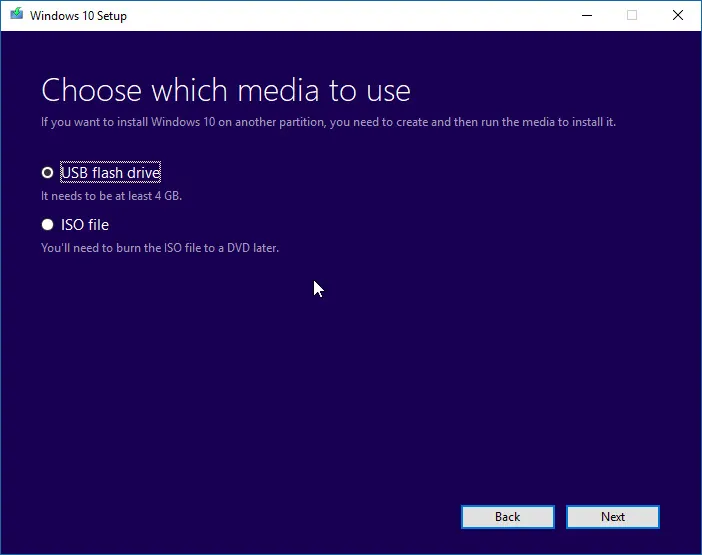
When you’re installing Windows 10 from a USB drive, you might face some problems. These include physical issues with the USB, wrong formats, and EFI/UEFI setup troubles. Other common troubles…
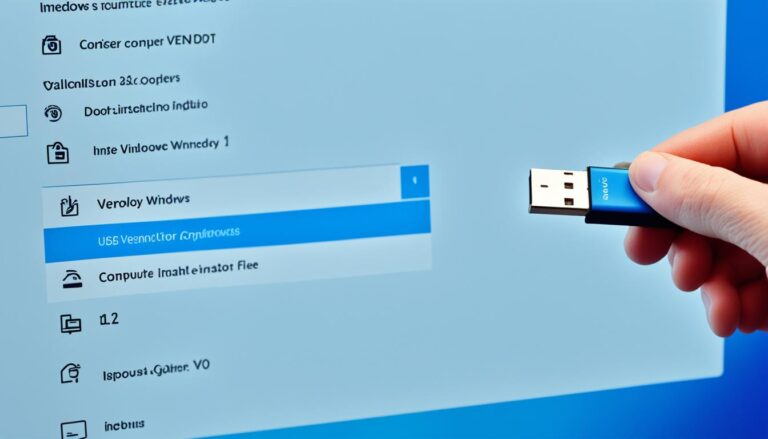
Ventoy is a free tool that lets you use a USB for installing Windows 10. It supports many file types, making it handy and easy to use. It’s perfect for…