Active Directory Users and Computers (ADUC) is essential for managing users and access in a network. Installing ADUC on Windows 11 can be done through PowerShell. The method varies based on your Windows 11 version.
For Windows 11 Pro users, use the Get-WindowsCapability command to see what’s available. If you have Windows 10 Pro version 1809 or later, add the ‘RSAT: Active Directory Domain Services and Lightweight Directory Tools’ via the Settings app. For older Windows versions or Windows 10 Home, download the RSAT package from Microsoft’s Download Center.
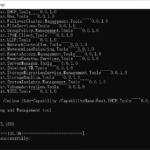
First, check your Windows version. Click the Windows button and search for “system info” to find the System Information page. In Windows 11, use the PowerShell command “Get-WindowsCapability -Name RSAT* -Online | Select-Object -Property DisplayName, Name, State” to view options. Access PowerShell by searching for it from the Windows icon. Ensure you run it as an administrator.
To install ADUC on Windows 11 Pro, start with the Get-WindowsCapability command. Then, use “Add-WindowsCapability -Online -Name [Package Name]” to install the selected option. Replace [Package Name] with the correct option’s name. Once installed, ADUC will be ready on your Windows 11 Pro machine.
For Windows 10 Pro version 1809 or newer, ADUC installation is through the Settings app. Go to Apps > Optional features, click ‘Add a feature’, and choose ‘RSAT: Active Directory Domain Services and Lightweight Directory Tools’. If you’re using older Windows 10 versions or Windows 10 Home, you’ll need to download the RSAT package from Microsoft. Run the installer and activate ADUC via the Control Panel.
Installing ADUC on Windows 11 is doable with PowerShell. The installation method depends on your Windows version. For Windows 11 Pro, PowerShell helps install what’s necessary from the Get-WindowsCapability command. For newer Windows 10 Pro versions, use the Settings app to add ‘RSAT: Active Directory Domain Services and Lightweight Directory Tools’. Older Windows versions or Windows 10 Home require downloading the RSAT package. Follow these steps to easily install ADUC on Windows 11, and manage your network efficiently.
Verifying Windows Version and Accessing PowerShell
It’s crucial to check your Windows version before starting the installation. Just click the Windows button and look up “system info” to open the System Information page. For those on Windows 11, a special PowerShell command, “Get-WindowsCapability -Name RSAT* -Online | Select-Object -Property DisplayName, Name, State”, helps you check available features. To open PowerShell, click the Windows icon and type in “PowerShell”. Remember to run it as an administrator.
Confirm Your Windows Version
To find out which Windows version you have, just do these steps:
- Click the Windows button at the bottom left of your screen.
- Look for “system info” and click on the System Information app.
- The System Information window will show your Windows version details.
Accessing PowerShell
Getting into PowerShell is easy if you follow these steps:
- Press the Windows button in the bottom left of your screen.
- Search for “PowerShell” and choose the Windows PowerShell app.
- Always run PowerShell with administrator rights.
Checking your Windows version and opening PowerShell are key initial steps. After doing these, you’re ready to install Active Directory Users and Computers on Windows 11.
Installing ADUC with PowerShell on Windows 11 Pro
For Windows 11 Pro users, installing Active Directory Users and Computers (ADUC) is easy using PowerShell. This guide will show you the steps to install ADUC on your Windows 11 Pro machine. It’s quick and straightforward.
Verifying Available Options
First, check what you can install with the Get-WindowsCapability command. Open PowerShell as an administrator to do this. Then, enter the following command:
Get-WindowsCapability -Name RSAT* -Online | Select-Object -Property DisplayName, Name, State
You’ll see a list of packages you can install. Make a note of the name of the package you want.
Installing ADUC with PowerShell
After picking your package, use the Add-WindowsCapability command to install it. Here’s how the command looks:
Add-WindowsCapability -Online -Name [Package Name]
For instance, if your package is “RSAT-ADDS”, use:
Add-WindowsCapability -Online -Name RSAT-ADDS
This starts the installation. It might take a bit, depending on your internet and system. When it’s done, ADUC will be on your Windows 11 Pro machine.
Using ADUC on Windows 11 Pro
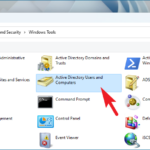
Once installed, find ADUC by searching in the Windows Start menu. Launch it to manage users and access within your network.
Summary
Installing ADUC with PowerShell on Windows 11 Pro is straightforward. Follow these steps to install ADUC and manage your network effectively. Make sure you verify the options, use the right command and package name, and you’re set to go.
Installing ADUC on Windows 10 Pro and Older Versions of Windows 10
If you have Windows 10 Pro version 1809 or newer, you can easily add ADUC. Just go to the Settings app. There, look for Apps > Optional features. Click ‘Add a feature’, then pick ‘RSAT: Active Directory Domain Services and Lightweight Directory Tools’ to start the install.
Got an older version of Windows 10 or Windows 10 Home? You’ll need to download the RSAT pack from the official Microsoft Download Center. Once downloaded, run the installation. Finally, turn on ADUC in the ‘Turn Windows features on or off’ area found in the Control Panel.
- Open the Settings app
- Navigate to Apps > Optional features
- Click on ‘Add a feature’
- Select ‘RSAT: Active Directory Domain Services and Lightweight Directory Tools’ to install
- Manually download the RSAT package from Microsoft’s Download Center
- Run the installer
- Enable ADUC through the ‘Turn Windows features on or off’ section in the Control Panel
Conclusion
Using PowerShell to install Active Directory Users and Computers (ADUC) on Windows 11 makes user management easy. Different methods are available based on your version of Windows. If you have Windows 11 Pro, use the Get-WindowsCapability command in PowerShell. Then, install using the Add-WindowsCapability command.
For those with Windows 10 Pro version 1809 or newer, adding ‘RSAT: Active Directory Domain Services and Lightweight Directory Tools’ is easy through the Settings app. This makes the setup smooth and fully integrated with your Windows 10 Pro system. For older Windows 10 versions or Windows 10 Home, you’ll need to manually download the RSAT package from Microsoft’s website.
By following these steps, ADUC can be added to your Windows 11 device. It lets you manage users and computers better. This boosts your network’s security and productivity.
FAQ
How can I install Active Directory Users and Computers (ADUC) on Windows 11 using PowerShell?
Installing ADUC on Windows 11 with PowerShell is straightforward. This varies by your version of Windows 11. For those with Windows 11 Pro, start with the Get-WindowsCapability command. It helps check what’s available and install what you need.
If you’re on Windows 10 Pro version 1809 or newer, add the ‘RSAT: Active Directory Domain Services and Lightweight Directory Tools’ feature via Settings. For older Windows 10 or Windows 10 Home versions, you’ll need to manually download the RSAT package from Microsoft’s Download Center.
How can I verify my Windows version and access PowerShell?
First, ensure you know your Windows version. Click the Windows button and search for “system info” to see your System Information page. In Windows 11, use the PowerShell command “Get-WindowsCapability -Name RSAT* -Online | Select-Object -Property DisplayName, Name, State” to view available options. Accessing PowerShell is easy. Just search for “PowerShell” via the Windows icon. Remember to run it as an administrator.
How can I install ADUC with PowerShell on Windows 11 Pro?
Windows 11 Pro users have a simple path to install ADUC with PowerShell. After confirming what’s available with the Get-WindowsCapability command, use the Add-WindowsCapability command for installation. The format is “Add-WindowsCapability -Online -Name [Package Name]”.
Just be sure to replace [Package Name] with the correct option from what’s available. When the installation finishes, you can start using ADUC on your Windows 11 Pro device.
How can I install ADUC on Windows 10 Pro and older versions of Windows 10?
Those with Windows 10 Pro version 1809 or later have an easy method. You can add ADUC by accessing the ‘RSAT: Active Directory Domain Services and Lightweight Directory Tools’ feature through the Settings app. Just go to Apps > Optional features, click ‘Add a feature’, and select ‘RSAT: Active Directory Domain Services and Lightweight Directory Tools’ to install.
For older Windows 10 versions or Windows 10 Home, the RSAT package must be downloaded manually from Microsoft’s Download Center. After the download, run the installer. Then, enable ADUC through the ‘Turn Windows features on or off’ option in the Control Panel.
Source Links
- https://www.reddit.com/r/Windows10HowTo/comments/16qs0h1/install_rsat_aduc_in_windows_11_via_powershell_or/
- https://techcommunity.microsoft.com/t5/windows-11/how-to-install-or-uninstall-rsat-in-windows-11/td-p/3273590
- https://www.serveracademy.com/blog/active-directory-users-and-computers-aduc-installation-and-tutorial/
