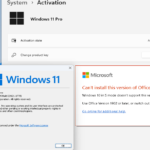
Trying to install or upgrade to Windows 11 might bring up some errors. But don’t worry. Many errors can be fixed with a few simple steps. First, let’s look at some common troubleshooting tips for installation issues.
If you’ve seen the “windows 11 install failed” message, don’t fret. This guide will give you helpful tips and solutions. We aim to get your Windows 11 installation going smoothly again.
We cover common errors and how to fix them. You’ll learn how to solve the “Windows 11 installation has failed” message. We also talk about what to do if your installation gets stuck and how to handle compatibility problems.
This guide offers step-by-step guidance and valuable advice. Our goal is to make your Windows 11 installation as smooth as possible. Let’s tackle those installation challenges together!
Common Windows 11 Installation Errors and Fixes
Trying to install Windows 11 can sometimes lead to errors. These errors can stop the installation from going smoothly. The good news is there are solutions for each error code. Let’s look at some common Windows 11 installation errors and how to fix them:
Error: 0xc1900223
This error means there’s trouble with the Windows Update service. You can fix it by restarting this service. Here’s how:
- Press Windows key + R to open the Run dialog box.
- Type services.msc and press Enter.
- Find the Windows Update service, right-click it, and select Restart.
- Try installing Windows 11 again after the service restarts.
Error: 0xC1900208 – 0x4000C
This error means your system doesn’t meet Windows 11’s requirements. Check that your computer has a compatible processor, enough RAM, and storage space.
Error: 0xC1900107
The 0xC1900107 error happens when you’ve got incompatible apps or drivers. To fix it, remove these apps and update your drivers. Here’s what to do:
- Remove incompatible apps: Go to “Apps” in the Settings app, and uninstall any that don’t work with Windows 11.
- Update drivers: Go to the manufacturer’s website and download the latest drivers. Installing these should help with the Windows 11 installation.
Error: 0x80073712
This error signals problems with your computer’s system files. You can use the System File Checker (SFC) tool to fix them. Here is the method:
- Start Command Prompt as an administrator.
- Type sfc /scannow and press Enter.
- Wait for the scan to finish. It will fix corrupted files.
- Restart your computer and try installing Windows 11 again.
Error: 0xC1900200 – 0x20008
This error often means there’s not enough disk space. Here’s how to free up space:
- Open File Explorer and navigate to the system drive (usually C:).
- Delete unnecessary files, such as temporary files and old downloads.
- Move some files to an external hard drive or cloud storage if needed.
- Once there’s enough space, try the Windows 11 installation again.
Error: 0xC1900202 – 0x20008
This error indicates your installation media is corrupt or not compatible. Try downloading a new Windows 11 ISO file from Microsoft. Create a bootable USB with the ISO, then use it for installation.
Error: 0x800F0923
The 0x800F0923 error is about security settings issues. Disable any third-party antivirus temporarily. Then attempt the Windows 11 installation again.
These examples cover some common errors you might encounter. For any error code, look it up to find solutions. By following these suggestions, you can solve these problems and successfully install Windows 11.
Tips to Fix Windows 11 Installation Failures
If you’re finding it hard to install Windows 11, don’t panic. There are steps you can take to solve the problem. Here are easy tips that can help with installation issues:
- Remove external hard drives: Disconnect any external drives before starting. They can mess with the installation.
- Check for compatible apps: Some apps might not work with Windows 11 and block the upgrade. Look for compatibility issues with your apps and update or remove them if needed.
- Perform a cleanup operation: If you’ve tried to install Windows 11 before and it failed, clean up the leftovers. Use the Windows Cleanup Tool or another utility to do this.
- Repair system files: Broken system files can stop the installation. Use the System File Checker tool to find and fix these files.
- Ensure PC meets requirements: Make sure your PC has what it takes for Windows 11. Check your hardware like the processor, RAM, and storage.
- Check for driver compatibility: Old or wrong drivers can cause issues. Update your drivers to the newest ones that work with Windows 11.
- Keep your PC plugged in: Your PC should stay on and plugged into power during installation. Losing power or turning off could lead to problems.
- Disconnect from VPN networks: If you’re on a VPN, disconnect before you start the install. VPNs can sometimes get in the way.
- Free up disk space: Make sure there’s enough room for Windows 11. Delete files you don’t need or move them to make space.
Follow these steps to boost your chances of a smooth Windows 11 installation and to dodge common issues.
Note: The image above shows how to tackle Windows 11 installation problems.
How to Fix Windows 11 Installation Has Failed Error
Seeing the “Windows 11 installation has failed” error can be very annoying. Luckily, you have different steps to sort it out. The issue might come from external hard drives, outdated or conflicting drivers, your PC not being up to date for Windows 11, bad Windows 11 ISO files, or problems with your disk, UEFI, secure boot, or MBR.
To tackle the “Windows 11 installation has failed” error, consider these steps:
- Disconnect external hard drives: External hard drives might mess with the setup. Remove them and try installing again.
- Update device drivers: Old or wrong drivers can lead to setup errors. Make sure your device drivers are up to date for Windows 11.
- Check PC compatibility: Make sure your PC is up to scratch for Windows 11. Use the compatibility list from Microsoft to check.
- Download a genuine Windows 11 ISO: If using an ISO for setup, check it’s real and not damaged.
- Perform a clean install: If nothing works, you might have to start over with Windows 11. This means erasing what you have and beginning anew.
By trying these steps, you can get past the “Windows 11 installation has failed” error. Always back up your important files before changing your system.
Troubleshooting Windows 11 Installation Stuck Errors
If your Windows 11 installation is encountering errors or getting stuck, several steps can help. Here are some effective methods:
1. Disconnect External Hard Drives
Before beginning the installation process, remove any external hard drives. These drives can interrupt the installation, causing it to freeze. After removing them, try restarting the installation and see if the problem continues.
2. Check the Copy of Windows 11 for Genuineness
It’s vital to use a genuine copy of Windows 11. Fake copies can trigger installation troubles. To avoid issues, buy Windows 11 from an authorised retailer or download it from the official Microsoft website.
3. Scan for Malware Infection
Conduct a thorough malware scan on your PC before installing Windows 11. Malware can disrupt the process, leading to hangs or errors. Use a trusted antivirus to clean your system of any malware.
4. Update Device Drivers
Old or incompatible device drivers can cause problems. Be sure your drivers are up-to-date before installing Windows 11. Check your computer manufacturer’s website for the newest drivers.
5. Check PC Compatibility with Windows 11
Make sure your PC can run Windows 11. If your hardware isn’t compatible or not strong enough, you might see errors. Use the PC Health Checkup app from Microsoft to verify your system’s compatibility.
6. Perform a Clean Boot
Still having trouble? A clean boot might help identify conflicts causing installation failures. Microsoft’s support website provides instructions on how to do this.
7. Update Windows
Ensure your existing Windows version is up-to-date. Updating can fix known problems and help with the Windows 11 installation. Go to Windows Update settings to check for updates.
To successfully install Windows 11, follow these troubleshooting tips. These include removing external drives, ensuring your Windows 11 copy is genuine, scanning for malware, updating drivers, checking compatibility, doing a clean boot, and updating your current Windows.
How to Resolve Windows 11 Installation Issues Due to Incompatibility
If your PC does not support Windows 11, you might face installation problems. But don’t worry, you can try several steps to fix these. Doing so could make installing Windows 11 on your PC possible.
- Check PC Compatibility: Use the PC Health Checkup app to see if your PC is up for Windows 11. This app will spot any issues that could stop the install.
- Enable UEFI Boot Mode and Secure Boot: Go into your computer’s BIOS settings. Turn on UEFI boot mode and secure boot. These settings make sure your PC uses the newest firmware and a safe boot setup. These are key for Windows 11 to work.
- Convert Disk Partition Type to GPT: Is your PC’s disk type MBR (Master Boot Record)? You’ll need to change it to GPT (GUID Partition Table) for Windows 11. You can do this with software made for partition management.
- Enable TPM 2.0 and Secure Boot in BIOS: Ensure TPM (Trusted Platform Module) 2.0 and secure boot are on in your PC’s BIOS settings. Windows 11 needs these security settings to be on for the install to go smoothly.
Follow these steps to tackle incompatibility issues. It will help you get ready for a successful Windows 11 installation.
Image depicting the resolution of Windows 11 installation issues due to incompatibility.
Fixing Windows 11 Installation Failures by Updating Hardware Drivers
Outdated or corrupt hardware drivers can cause Windows 11 installation failures. These drivers, when not working right, may lead to errors during installation. It’s vital to update your hardware drivers to ensure everything works smoothly.
Manually Updating Hardware Drivers
Updating hardware drivers by hand takes time but can fix compatibility issues. Here’s how to do it using Device Manager:
- Right-click the Start button and choose “Device Manager.”
- Find the device you need to update by expanding the categories.
- Right-click the device and click “Update driver.”
- Select to search for drivers automatically or choose from your PC.
- Complete the update by following the instructions on your screen.
By updating drivers yourself, you can solve many issues preventing Windows 11 from installing properly.
Automatically Updating Hardware Drivers
For an easier way, use tools like Advanced Driver Updater to update drivers automatically. These tools check your system, finding drivers that need updating. Here’s how to use Advanced Driver Updater:
- Install Advanced Driver Updater on your Windows 11 computer.
- Open the software and start a scan.
- Look at the list of drivers that need updating.
- Choose the drivers to update and click “Update All”.
- Let the software download and install new drivers.
Using Advanced Driver Updater makes the process simple and efficient. It ensures your system has the latest drivers for a smooth Windows 11 installation.
Updating hardware drivers is key to fixing Windows 11 installation issues. It makes sure everything is compatible and runs without problems. Whether updating manually or using tools, keeping drivers up-to-date is important for a successful installation.
Conclusion
Fixing Windows 11 installation problems can be tough. But, by following this guide, you can fix common errors and successfully upgrade. Make sure your device is compatible and your drivers are up to date. This helps avoid problems.
If you hit a specific error, follow the steps provided to fix it. Be patient and keep trying, as it might take several tries to fix the problem.
With the right advice and a bit of patience, you can get past these issues and enjoy Windows 11. You now know how to sort out any installation problem. This lets you enjoy the new features and better performance of Windows 11.
FAQ
What are common Windows 11 installation errors and how can they be fixed?
Common Windows 11 installation errors include a variety of codes such as 0xc1900223, 0xC1900208 – 0x4000C, and 0xC1900107. Others are 0x80073712, 0xC1900200 – 0x20008, and 0xC1900202 – 0x20008. Also, 0x800F0923, 0x80200056, 0x800F0922, along with messages like “We couldn’t complete the updates. Undoing changes. Don’t turn off your computer.”, “Failure configuring Windows Updates. Reverting changes.”, and “The update isn’t applicable to your computer.”
For each of these errors, specific steps can help solve the problem.
What are some general tips to fix Windows 11 installation failures?
To fix Windows 11 installation issues, try removing external drives first. Check apps that might block the upgrade. You should also clean up after a failed installation try. Repairing system files, ensuring your PC meets Windows 11’s minimum requirements, and checking driver compatibility are crucial.
Make sure your PC is charged and stays on during the update. Disconnect from VPNs and free up disk space too.
How can I fix the “Windows 11 installation has failed” error?
If your Windows 11 install fails, first try disconnecting external drives. Then, update your device drivers. Check if your PC can run Windows 11. Download a real Windows 11 ISO file for a clean install.
What troubleshooting steps can I take for Windows 11 installation errors?
For troubleshooting, first disconnect external hard drives. Ensure your Windows 11 copy is real. Scan your PC for any malware and update your device drivers. Check if your computer is compatible with Windows 11. You can also do a clean boot and update Windows.
How can I resolve Windows 11 installation issues due to incompatibility?
To tackle incompatibility, start by confirming your PC’s compatibility using the PC Health Checkup app. Enable UEFI boot and secure boot, and switch your disk type to GPT. Also, turn on TPM 2.0 and secure boot in the BIOS settings.
How can I fix Windows 11 installation failures by updating hardware drivers?
Updating hardware drivers can fix installation issues. Use Device Manager for manual updates or tools like Advanced Driver Updater for automatic updates. Keeping drivers updated helps avoid compatibility problems and smoothens the installation.
What are some troubleshooting tips for resolving installation failures on Windows 11?
To resolve installation issues, always check for compatibility, update your device drivers, and follow specific steps for each error. With the right steps and some patience, you can solve these problems and enjoy Windows 11’s features.

