OpenSSL is key for boosting your Windows 11 system’s security. This guide will show you how to install OpenSSL on Windows 11. By doing so, you will make your computer more secure and safeguard your data.
When you install OpenSSL on Windows 11, your data gets a strong layer of protection. This means your important files and emails are safe. OpenSSL also lets you create SSL certificates. This improves your website’s security and could help it rank better on search engines. Plus, OpenSSL works across different platforms. So, it’s helpful no matter what device or system you’re using. With OpenSSL, you can protect your info, build trust through SSL certificates, and enjoy security across all platforms.
OpenSSL Benefits
Data Encryption
SSL Certificates
Cross-Platform Compatibility
1. Enhanced Security
1. Protect sensitive data
1. Establish trust with users
1. Works on multiple devices and OS
2. Privacy Assurance
2. Secure files and emails
2. Encrypt communication
2. Seamless integration
3. Improved Search Rankings
3. Comply with data protection regulations
3. Boost SEO and rankings
3. Widely supported
Prerequisites for Installing OpenSSL on Windows 11
Before you start installing OpenSSL on Windows 11, there are some things to check. These ensure your installation is successful.
System Compatibility
First, make sure your Windows 11 can run OpenSSL. Check if your PC has the right specs and OS version. Also, look for any other software you might need.
Administrator Access
To put OpenSSL on your system, you need to be the admin. Being an admin lets you change system files and install apps. If you’re not the admin, you’ll need to get permission first.
Visual C++ Redistributable
OpenSSL needs the Visual C++ Redistributable to work. Make sure it’s on your Windows 11 before you start. If not, go to the Microsoft website to get it.
Having a good internet connection is key. It’s important for downloading OpenSSL and any other things you need. A strong connection makes the installation go smoothly.
Meeting these prerequisites means you’re ready. Now you can install OpenSSL on your Windows 11 and make it more secure.
Step-by-Step Guide to Install OpenSSL on Windows 11
Follow these step-by-step instructions to successfully install OpenSSL on your Windows 11 system:
Download OpenSSL:
First, go to the official OpenSSL site at https://www.openssl.org. Find the downloads page and select the right version for Windows 11. Click the download link to begin downloading.
Run the Installer:
After the download, find the file in Downloads and double-click it. Follow the instructions on your screen to install.
Customization Options:
During setup, you’ll see many customization choices. These let you select the features of OpenSSL you wish to install. Pick what you need.
Set Environment Variables:
To make sure OpenSSL works well, set the environment variables. Open Control Panel and head to System and Security. Select System and click “Advanced system settings”. In the System Properties, go to “Advanced”. Click “Environment Variables”. Under “System variables”, press “New” and add OpenSSL variables.
Final Thoughts
To install OpenSSL on Windows 11, just follow these steps. Remember to set up the environment variables for smooth use. Once installed, OpenSSL boosts your system’s security with top-notch encryption tools.
Verifying the Installation
After installing OpenSSL on your Windows 11 system, checking if it’s set up right is key. These steps will help you confirm OpenSSL’s correct installation and readiness.
Open the Command Prompt: Start by opening the Command Prompt. Press the Windows key + R, type “cmd” in the Run box, and click “OK”.
Check OpenSSL Version: In the Command Prompt window, enter openssl version and hit Enter. This will show the OpenSSL version on your system.
Test OpenSSL Functionality: To see if OpenSSL works well, try some commands. You might generate an SSL certificate or encrypt a file. Run a command to see if it works right.
Troubleshooting: If there’s a problem, check OpenSSL’s setup and environment variables. Make sure all needed components and prerequisites are in place.
By doing these, you can make sure OpenSSL is properly installed on your Windows 11 system and ready to go.
Example Output:
OpenSSL 1.1.1k 25 Mar 2021
Frequently Encountered Issues:
Issue
Solution
Command ‘openssl’ not recognized
Include OpenSSL in your system’s environment variables. Access the Control Panel, go to System and Security, and choose System. Click “Advanced system settings,” head to the “Advanced” tab, and press on “Environment Variables”. In “System variables”, pick “Path” and hit “Edit”. Add the OpenSSL installation directory path, save, and retry the command.
Error: Couldn’t load SSL library
Make sure Visual C++ Redistributable for Visual Studio is installed on your machine. Grab the newest version from Microsoft’s official site and install it. Restart your computer and try the command once more.
Conclusion
Putting OpenSSL on your Windows 11 system is key for better security and keeping your data safe. Just follow the steps given, and you’ll have OpenSSL working on your system. This upgrade will strengthen your security measures and protect your information.
Make sure the installation went well by checking it. You can do this easily by opening the command prompt and seeing if OpenSSL is up to date. This is a critical step to avoid any future problems.
OpenSSL is crucial for those who want to encrypt data or need SSL certificates. It’s a great help for Windows 11 users looking to protect their files or boost their website’s security. OpenSSL is both flexible and dependable for your security needs.
FAQ
Why is OpenSSL important for Windows 11?
OpenSSL is vital for improving security on Windows 11. It encrypts data, creates SSL certificates, and works across platforms.
What are the benefits of installing OpenSSL on Windows 11?
Installing OpenSSL on Windows 11 brings many advantages. It protects data, secures files and emails, and boosts website safety. It also helps your website rank better on search engines and ensures compatibility across different platforms.
What are the prerequisites for installing OpenSSL on Windows 11?
Before you can install OpenSSL on Windows 11, there are a few things you need. Make sure your system supports OpenSSL and you have admin rights. You’ll also need to install the necessary Visual C++ Redistributable and have a good internet connection.
How do I install OpenSSL on Windows 11?
To install OpenSSL, follow the tutorial’s guided steps. You’ll download the software, run the installer, and perhaps adjust some settings. It’s a straightforward process.
How do I verify the installation of OpenSSL on Windows 11?
After installing OpenSSL, you can check it’s working correctly. Open the command prompt, check the version of OpenSSL, and test its features. The tutorial has all the details you need for this.
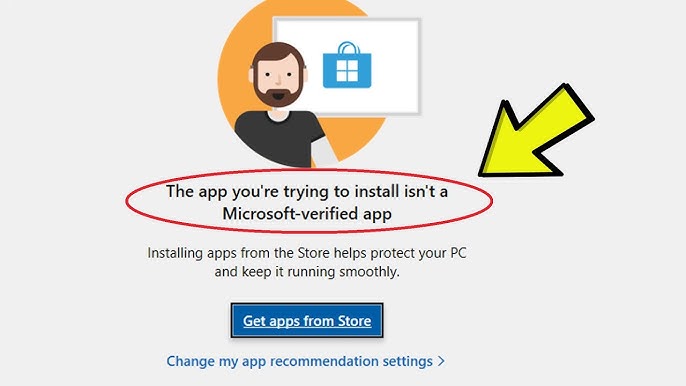
Microsoft has introduced Microsoft Verified Apps in Windows 11. These apps go through a detailed check to ensure they are safe. But, some users might want to turn off this…
Welcome to our simple guide on setting up Fortnite on Windows 11. Are you eager to play this popular battle royale game on your PC? You’re in the perfect spot….
Usually, Windows 11 asks you to sign in with a Microsoft account during its setup. But you might want to use a local account instead. This guide shows you how…
Are you using Windows 11 and wish to install IIS (Internet Information Services)? You’ve come to the right place! We’ll guide you step-by-step to install IIS on Windows 11. This…
Our guide will show you how to install CentOS on Windows 11 using a virtual machine. This guide is perfect for developers, sysadmins, or Linux enthusiasts looking to run CentOS…
The best laptops with Windows 11 pre-installed enhance your experience with the newest OS. They offer better performance, advanced features, and stronger security. This guide will help you pick the…